Knightly extravaganza!
This post is a bit of a mixed bag, with two new knights, a couple of new group shots and some armies on parade WIPs - enjoy!
Shock Manta; 11th Knight of the Court
 |
Shock Manta has arrived!
|
In my last post, I hinted that I was working on one final Knight to bolster the ranks of the Fisher King.
Well, Shock Manta is now complete and I'm very pleased to add him to the court. Ever since the were released, I've been eyeing up the Chaos Knight chassis - their double jointed knees, exposed carapace piping and stylised plating just screamed Fisher King to me!
The concept for Shock Manta was for a kind of deep sea spear fisherman crossed with Murmillo a gladiator! Murmillo's were famous for their large Ovoid helmets and their asymmetrical shoulder armour. Although I didn't want to completely strip one shoulder plate from Shock Manta like a true Murmillo, I did decide early on that I wanted two distinctly different shoulders.
As for the spear fisherman look, I think that's fairly self explanatory, although I'm glad I went with the t-strike gauntlet to help him reload his giant spears as it gave rise to the spear hopper at the back as well!
All in all, I think Shock Manta has a very unique look while still dropping seamlessly into the army - I hope you enjoy the pictures!
 |
Shock Manta pauses for a moment to take in the majesty of Corbenic's mighty oceans
|
 |
Shock Manta's giant speargun, resting at his hip
|
 |
The stilt-like double jointed Chaos Knight chassis really suits my household; good for wading in the shallows while on the hunt
|
 |
From behind you can see the gigantic extra spears held in the hopper clamps until needed
|
 |
| Shock Manta is already clutching a double-pointed spear ready to load into his cannon after loosing his first deadly bolt |
 |
The carapace mounts a double harpoon cannon which started life as a pair of pistons and some Ambot armour!
|
 |
The large grilled face plate protects the knight's delicate sensors and augers
|
 |
Like the other knights in the court, Shock Manta has large engine filters instead of smoke stacks, allowing him to be fully submerged without flooding the knight's engine
|
 |
Another view of the spear clamps - you can also see the large hoist which is used to help service and re-arm the knight
|
 |
Shock Manta has a normal Thunderstrike Gauntlet, but with the digits from the Chaos Knight kit. They needed a little alteration as the Chaos Knight is right-handed.
|
 |
| I made the half-mail shoulder pad with actual metal links. This was by far the most complicated and time consuming part of the while build, but it looks fantastic! |
 |
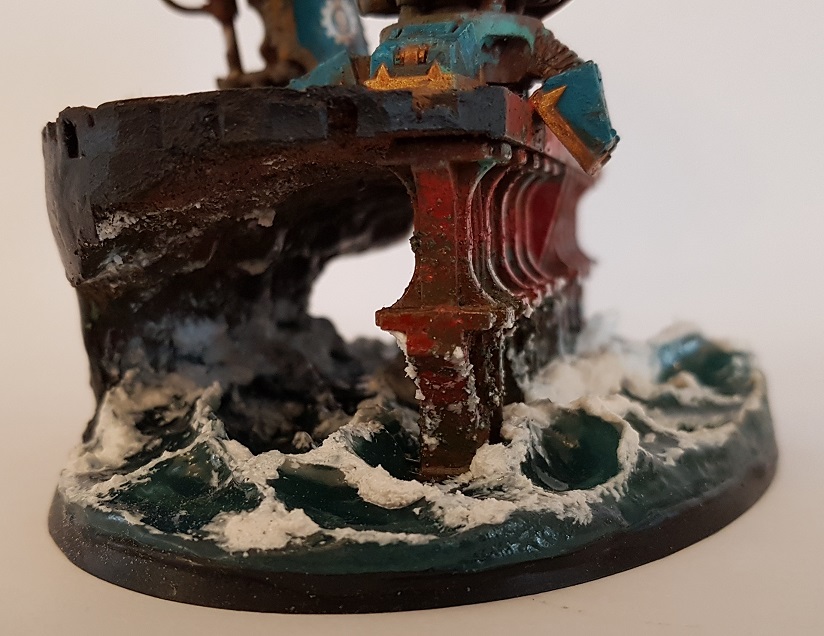
Shock Manta's base was actually made with a combination of techniques which I had learned from making all of my other knights. I think the frothing waves are especially convincing!
|
 |
I was especially pleased with the weathered platform which the knights is standing on and the way that it transitions into the rocky beach behind
|
Veles Meridian - Knight Scion
 |
| What Knight of the court would be complete without a Scion pilot? Meet Veles Meridian! |
 |
Veles Meridian eats fish and chips while waiting for orders
|
 |
To tie him in with his mount, Veles has two mechadendrites extending from his carapace, just like Shock Manta!
|
 |
Veles' left hand has been replaced by a vicious looking claw. There are many rumours on how he lost his hand, including a fist fight with a herellion devil squid. Whatever the truth, he's very tight-lipped (voxed?) on the subject...
|
 |
Veles is adorned with packs and cases for maintaining his knight's systems while away on mission
|
 |
Veles is never seen without his signature shock rifle
|
 |
Veles Meridian - not the best at handshakes
|
Shock Manta WIPs
 |
Veles Meridian before painting - many kits died so that he may live...
|
 |
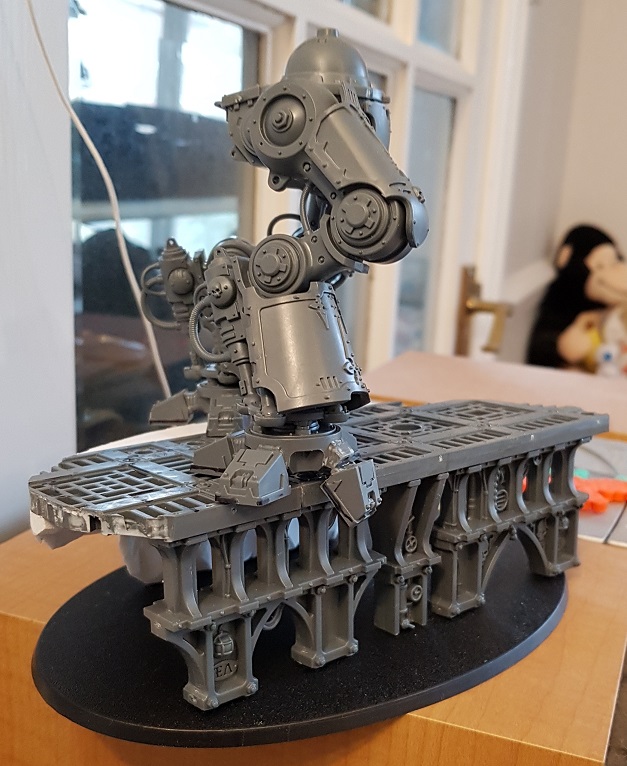
| I started the build for this knight by constructing the base platform and cliff face so that I could then build the legs to fit. I cut and repositioned the front toe on the right foot so that it was 'gripping' the edge of the platform. Go go monkey feet! |
 |
| While building the knight chassis, I couldn't glue him to the platform as I needed to be able to detach him and the platform in order to sculpt the waves and cliff face. I lost count of the number of times he toppled off the edge of the table... |
 |
I carved four spearhead variants and chose the brutal looking 'classic' spear to go in the gun barrel
|
 |
As I've documented the process of how I create realistic resin waves before, I won't go through it all again. Suffice to say that I sculpted, silicone moulded then cast the waves in resin as I have done for my previous projects
|
 |
| As with all members of the court, I applied all of the rust, weathering, verdigris and texture over a silver basecoat. This is always a scary stage, but I am more confident that it will all be ok in the end now! I also like that it makes them look like Talos the bronze statue from Jason and the Argonauts... |
 |
I always start the detailing by painting the trim and other gold details. Next I give all of these areas a heavy fleshshade wash followed by some very strong verdigris (sotek blue watered down with nihilikh oxide) then carefully paint the coloured plating in their block colours
|
 |
Because I start with the weathered metal, I can deliberately apply the armour paint so that some of the layer underneath is showing here and there
|
 |
| I work back into the most damaged rusty areas with more paint and texture where I think it's needed |
 |
| I apply decals before I work back into the weathering to make sure that they receive chipping and water staining with the rest of the armour plating |
 |
I test fit the sub assemblies several times while painting just to make sure that the highlights and weathering are consistent
|
 |
| As I had just completed Veles Meridian, I used the opportunity to take a rather self-indulgent picture of all 11 knight scions together - I love these guys and girls so much!! |
Armies on Parade
Due to Covid-19 lockdown measures here in the UK, the Court of the Fisher King hasn't yet made the trip to Warhammer World for a guest exhibition as planned. Obviously I'm disappointed, but the display should still happen at some point next year once the world rights itself again! While Covid measures have limited many things, Games Workshop have moved with the times and have shifted Armies on Parade to an online competition this year. As I've already constructed an army, I decided that I should make it eligible for the competition and make an entry!
In order to compete, I needed to make a display board for the army. I wasn't happy to simply display my themed army on an unconnected board, so I set about designing one which would not only incorporate all the bases of my knights, but combine them into one cohesive display piece.
 |
First of all, I created a paper template, then cut an MDF board for the Knights. I settled on the 22" X 30" board space allowed by the rules of the competition. The knights at the back would need to be elevated to allow them all to be seen at once. The bases also dictated the placement of half of the knights. Although I had kept the waves and platforms consistent throughout the builds, they were at different heights. I'd need to be a bit creative to make this work...
|
 |
| I used extruded foam and a hot glue gun to bulk out the basic shapes so that I could start testing the knight positions |
 |
Using the patented 'books for extra height' technique, I marked out the areas which needed to be adjusted
|
 |
I sculpted all of the rockfaces with a knife and cut the base holes for each knight individually for optimal height matching!
|
 |
From lower down, you can see that the display is very tall as it has three separate levels for the knights! I did some basic gap filling which has now fully dried. Next I'll be working on texturing and detailing. Look out for updates soon as I only have two weeks left to get my entry in!
|
The ranks of House Raven swell!
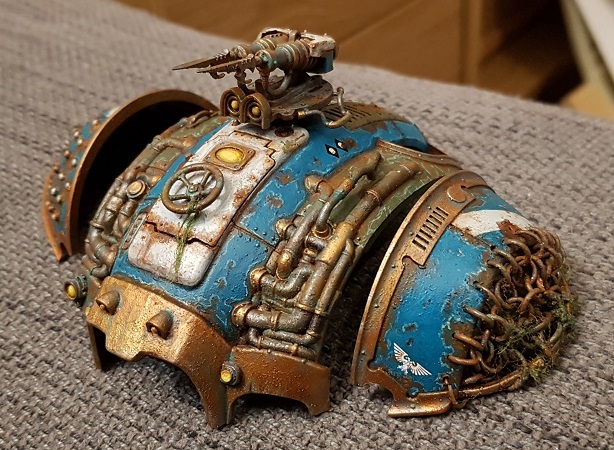
Finally, I wanted to show some pictures of my most recently painted House Raven Knight Paladin, Cognis.
 |
Cognis is seen here, bracing himself to fire off a salvo from his rapid fire battle cannon
|
 |
Adhering closely to the House Raven livery, Cognis is a far cleaner and more uniform beast than anything in the Court of the Fisher King!
|
 |
Cognis proudly sports the yellow, black and white hazard stripes which are synonymous with House Raven
|
 |
Cognis is decorated with many honour badges, kill markings and purity seals
|
 |
| Although the style and colouring of my Raven Knights is always the same, I take the opportunity to move the hazards to different areas on each knight for some visual distinction between them |
 |
| Cognis displays the symbol of Legio Metalica on his knee plate, confirming his allegiance to his princeps brothers |
 |
I used a spare Magaera head for Cognis as it fits the Questor Mechanicus theme very well
|
 |
| Arbiter, Cognis and Rygan stand ready |
 |
And all rejoice with the arrival of their beefy brethren, Siegbreaker
|
 |
| Although different, the knights work well as a cohesive battle force |
 |
The variety in carapace markings is more apparent when the knight are viewed from above
|


