Showing posts with label Skorpius Dunerider. Show all posts

Wednesday 22 July 2020

Snapper and the Blowfish

Mechanical wonders abound!

The Court of the Fisher King
This week saw me finish two new units for The Court of the Fisher King; the Skorpius Dunerider Blowfish and the Sentinel walker Snapper.  The Court is really coming along nicely, with only 2 Skitarii squads, 2 more knights and the Knight Scions for 5 of the knights to go!  If I finish them in the next few weeks, I may even rewards myself with one last Knight and some Kastellan Robots before finally sealing the lid on this long-term project!

The Blowfish

It took a while to complete, but I have finished finished my Skorpius Dunerider, The Blowfish.  I am really happy with the final look of this miniature; I did make some small adjustments to the model including changing the crew and removing the long whip aerials, but in general, I didn't need to make too many changes to the kit.  The main build challenge was the base which was covered in a previous post - painting it was really enjoyable and I would highly recommend a Skorpius kit to any Mechanicus collector!

For a simple concept, this miniature took a lot of effort to complete!

The large resin base is a little excessive, but it is only meant for display, detaching from magnets within the hull when I want to remove the Dunerider
I'm really happy with the waves and spray on the finished piece - it really is skipping over the waves!
The split wake from the turbines works really well
The crew were intentionally all replaced with servitors - they won't get seasick like normal humans!
The Blowfish is painted in the same colour scheme as its Knightly companions
All of the servitor crew are armed with harpoons as is the custom with this force!
I really enjoyed painting this miniature; I really went to town with the rust and weathering! 
The rusted deck and internal hatches all showing signs of water damage
The sea base in all its glory - not the metal tipped flight stems which the hull magnets attach to
The two removable Servitors ever vigilant at their respective portholes
Grim and implacable, the Servitors exit the landing craft
Sacristan Nautolex hitches a ride
Even the Fisher King himself sometimes requires transportation!

Snapper

Snapper was built shortly after The Fisher King but has sat unpainted for almost 2 years!  I finally finished him at the same time as painting the Blowfish.  Working on them both simultaneously allowed me to get them done quickly as I painted similar sections on both miniatures at the same time.

He may be the smallest walker in this force, but he's packed full of character!
From this side, you can see the front facing tazer on the main hull and the additional railing added next to the driver's hatch
Snapper has had his traditional Sentinel missile armament replaced with a multi-shot harpoon launcher!
The rear exhaust ports have filtration caps for underwater operations
Large air tanks fuel the harpoon launcher
Snapper's hull bears multiple yellow lamp lights like his larger Knight cousins in the Court

Friday 3 July 2020

Imperator, a micro Siegebreaker & the Blowfish

This week's progress update is very much a mixed bag which I hope you'll enjoy, including a long overdue update on the Imperator build, & a couple of teeny weeny Knights.  But first, a quick photo of what's on my painting table...

The Blowfish... now in glorious colour (sort of)!

I've now painted the crew of the Blowfish and have given it a lovely coat of my patented rusty coastal weathering recipe.  I always do this layer for all members of the Court of The Fisher King as it helps tie them all together regardless of the specific paint patterns I use.  I also took some time over painting and sealing the underside of the watery resin base to add some depth and colour variation to the waves.  I still need to build up the wave patterns and spray with heavy medium and some surf texture, but for now, I think it's coming along nicely! 

The old rust bucket so far!

Imperator Build Update

It's been a while since I posted an update on the Imperator build.  It's not because I haven't been busy working on it, but more because it's such a large project, I could write a post after every weekend spent measuring, designing, drawing to scale, cutting, fitting then filling the various components, but it would be dull for you my dear reader!

So, I have decided to only post when I feel that I have reached a milestone of interest.  The most recent milestone was the assembly of a foot, some torso detailing and the completion of the neck socket.

Neck socket

Although it's not the most interesting element visually, making a neck socket which could hold the weight of the head with only magnets and still allow me to make something aesthetically pleasing was a tricky prospect.  It has taken me a lot of fiddling and testing to come up with a solution!

I started by gluing some large steel washers into the neck socket to give my magnets something to grip.  I didn't use magnets on the receiver as I didn't want polarity or repositioning issues later on 
Next I filled the socket with Milliput and smoothed it to a nice rounded finish.  This was my plan all along, so I had intentionally left a depth of approximately 5mm of space to make sure I had room to fit an attaching mechanism 
Once the putty had cured, I drilled into the surface to the depth of the washers using a dremmel bit the same width as the magnets I'd be using
Closer up, you can see the surface of the embedded washers peeking through! 
I used an old slow cooker lid handle which I had squirrelled away for the base of my next coupling.  I used a very strong, viscous glue to set the magnets into the right position.  This picture cannot even begin to convey the frustration of mounting five magnets which just want to hold hands...
Once the glue had fully set, I used more Milliput to set them in place.  This will be sanded a little more cleanly once it's cured, but it fits perfectly!
And there we have it - the neck coupling sitting nicely within the neck socket with a pull strength of around 2kg.  This give me a nice solid plastic disc  to work with and a pre-set screw in bolt which I will use to help make a solid mechanical join on the head
It may seem a bit dull, but the socket assembly is vital in terms of set up for the head sculpt.  Below is a draft floor plan of the head interior.  I've decided that the head will house only the Princeps who will be suspended from the ceiling on a large mechanical arm where she can easily see all of the view screens at the front of the cabin.

A small platform extends from the command module door at the back of the head cavity. View screens behind the titan's optics are arrayed before the Princeps
As this is a scale drawing, I've been using the Princeps miniature to ensure that there is sufficient room for her to be suspended from the top plate

Torso Progress

As the torso is one of the main components and certainly have the largest surface area, I'm taking my time in constructing it. Now that I'm happy with the practical structure, I'm moving on to some detailing and reinforcing the structure where necessary.  The sub assemblies will be 1) the carapace, 2) the torso, 3) the head, 4) & 5) left and right arms and finally, 6) the legs and pelvis.  The miniature will need to be broken down into these parts for storage and transport, so the design process needs to incorporate practical mechanisms to allow this.

Since the last update, I have magnetised the carapace plate and made a large waist section which the carapace now plugs into.  I have also added the belly section to the front of the torso
As well as the magnets, I've also added guide rails to the underside of the carapace section to make sure that everything locks into place properly.
This is the underside of the carapace showing the bar magnets and guide rails as well as the underside of the macro cannon tower power plant
The rear of the titan torso now houses a dual reactor, an observation / maintenance platform and an external hatch for access.  I'm really pleased with how this stage is coming along as it's already starting to look more like a real titan!
I've started detailing the underside of the carapace platform now, leaving a gap to incorporate the base of the rear mounted macro cannon tower which extends over the edge of the platform
A close up of the carapace ceiling vent
These exhaust vents were hand crafted to sit the end of the largest rear facing support struts
Here they are in position.  The two smaller outer struts will also have vents while the ends of the forward facing struts will have Legio designs and optics built into them 

Feet

The other main structural elements which I'm keen not to underestimate is the feet and legs.  I've previously shown the underlying structure of the feet, but today I wanted to show the components which have gone into cladding just one of the foot assemblies and the process I used to get there.

First I drew up the patterns - this is just what I needed to cut to clad one of the outward facing toes!
I cut all of the toe components at the same time so that I could make sure they were all matched
This is the side cladding for one of the toe sections
Test fitting the parts
And now all glued in place!
Once both side facing toes were clad, I moved on to the front facing toe and the stairway to the entry hatch
The basic foot assembly - solid as a rock!  Once the legs and pelvis are completed, I will affix these permanently to the gigantic 80cm MDF base
Further detailing added to the forward toe.  A lot of filling is still needed on the feet, but I'm holding off on that until all of the structural elements are complete
And now for something a bit smaller!

AT Scale Porphyrions

I recently completed my 40k scale House Raven Knight Porphyrion Siegebreaker and have been dying to recreate him in Adeptus Titanicus scale the same way I did for my Reaver titan Ferrum Dominus.  Well, I finally got round to doing it and I also made him a friend! Enjoy the pictures and I'll post an update on these little beasts soon!
Mini AT scale Siegebreaker!
40k scale on the left and AT scale on the right
He even has a friend to accompany him in Adeptus Titanicus battles!

Friday 26 June 2020

Skorpius Dunerider - Blowfish

The Blowfish

Skimming over the waves, the Blowfish is the perfect transport for Corbenic's Skitarii Aquis troops

The Blowfish is a project which I started a couple of months ago to accompany the small band of Skitarii Aquis PDF troops which will accompany The Court of The Fisher King.

The original idea was to have the miniature hovering in the truest sense using magnets.  This proved difficult to achieve for a number of reasons, the main one being the need for an electromagnet to project an even field which the skimmer would be able to sit on and the additional batteries, wiring etc which would need to be hidden in the base.

In the end I decided that it would compromise the look of the finished piece for the sake of a gimmick that really wasn't worth it.  I've instead achieved the look I wanted by creating a resin cast base with two magnetised rods to support the hovering craft above the waves.

Designing the base

I decided early on that I wanted two things from the base.  Firstly, the craft had to hover over it as if crossing a large body of water.  Secondly, it had to look as though it is interacting with the water in a  realistic way.  That meant water dispersal from the passing of the craft and its large rear mounted fans.

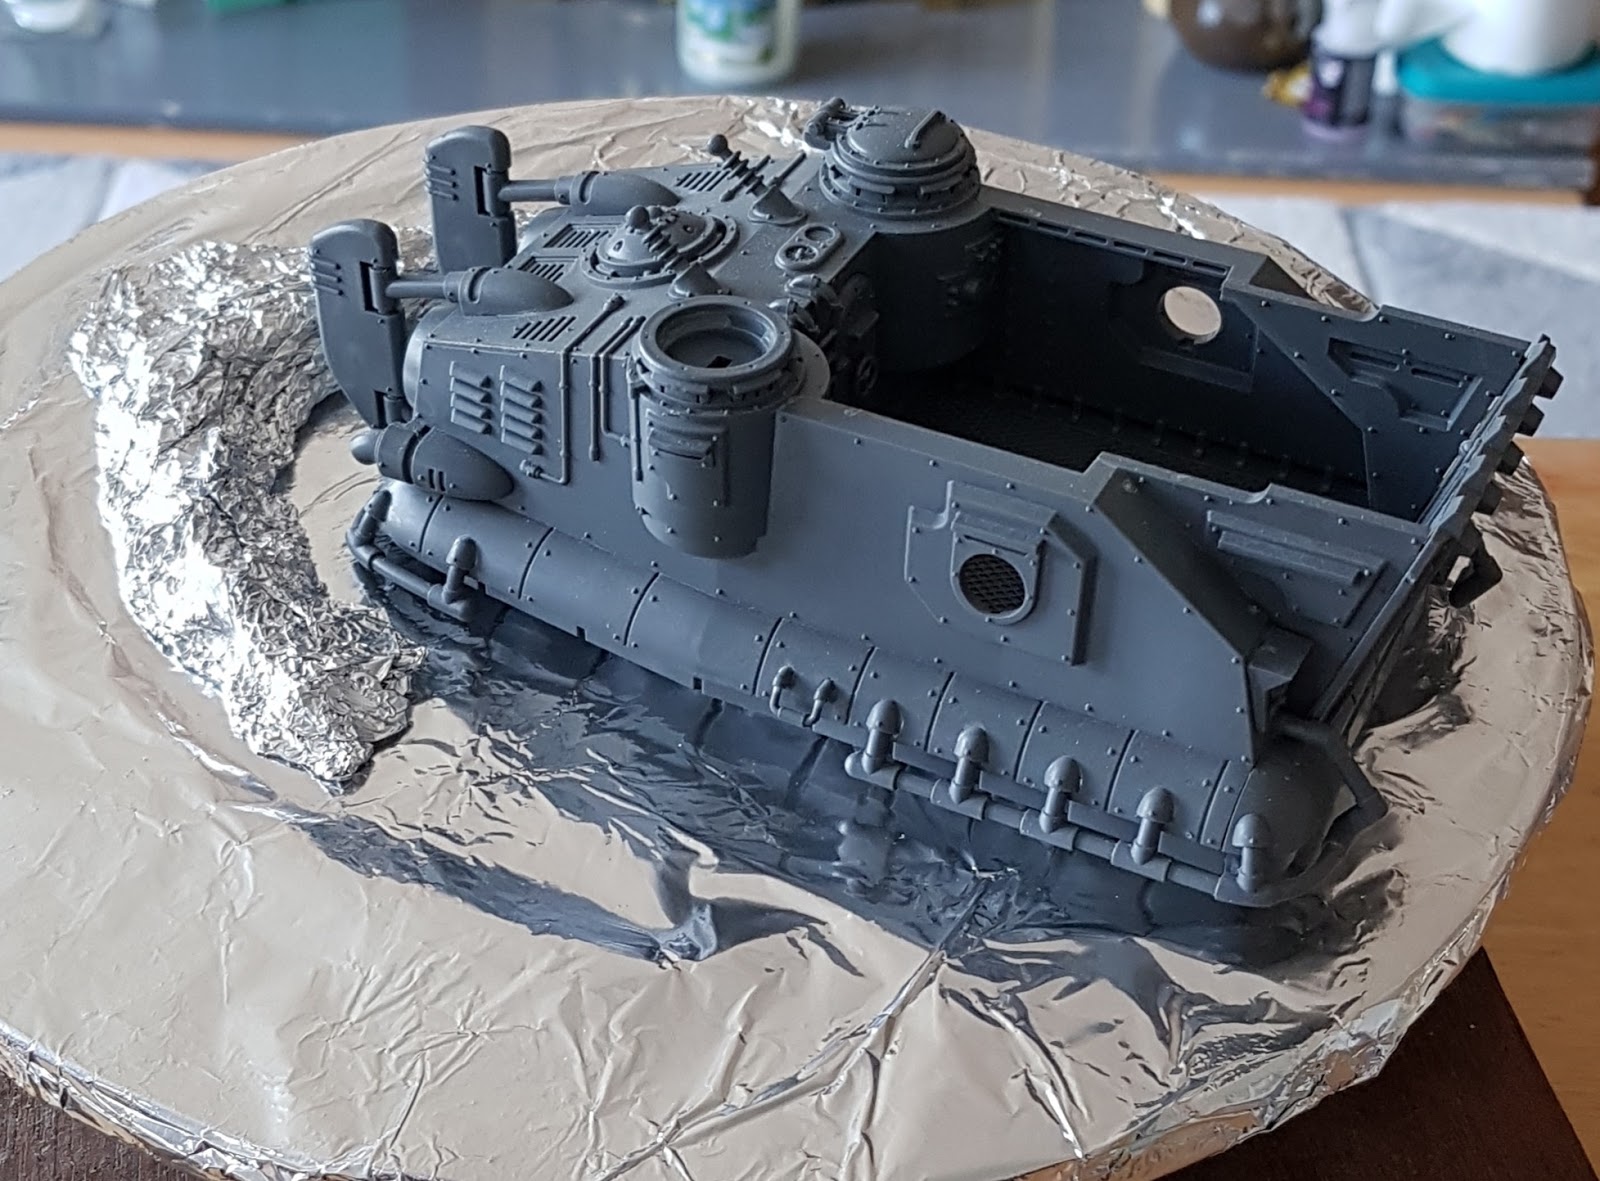
I started as always by looking at the closest approximation in the modern world.  The Skorpius Duneride is actually a hybrid design consisting of:

The look of a traditional landing craft like the American LCM8:


And the functionality of a modern hovercraft like the gigantic Russian Zubr class transport hovercraft:

Although the Dunerider looks like the LCM8 with the fans of the Zubr, the way it would move across a body of water and the way that it would impact the surface would be a lot more like the Zubr than the LCM8 which is more like a traditional boat.

Below is an image of a Zubr hovercraft moving over water.  The most important thing to note is how the water behaves as its fundamentally different to the way in which it behaves around the hull of a ship.  Whereas a ship cuts through water with a pointed hull, displacing it in a triangular pattern right from the front, a hovercraft has a larger, blunt nose which 'hovers' above the water rather than pushing through it.  The water displacement starts much further back, around halfway along the craft, spraying up higher towards the rear.  The airflow of the fans also part the water and leave a shallow double-wake pattern.


This lengthy explanation leads me to the base itself.  I wanted to sculpt the wave patterns so that the Dunerider looked more like a modern hovercraft passing over the water.  Below is a sort of photo diary of the sculpting process.  It's pretty straightforward, but I've detailed it anyway for anyone who wants to try and replicate the process!

Sculpting the base

Following the rather painful process of making Conga Blue's base, I decided to skip the cheap option and restocked all of my supplies now that lockdown has eased a little.  It still took a few weeks to get some of the chemicals and clay I needed, but making the base would be less stressful with the correct materials.
As I'd be sculpting the base from Super Sculpey, I started by coating my potter's wheel with tinfoil. Next I started forming the basic shape of the wake with foil around the rear of the Dunerider
I slowly built up the sculpey to make a thin platform which would go the length of the craft
Here's the rest of the basic shape with its foil core 
I slowly started to build up the wave walls from the mid-point of the model
I kept test fitting the craft to make sure that it fit in between the waves, keeping in mind that it would sit just above them in the final piece 
It looked odd when working on this from above, but it got me really excited to see it from the sides as it all came together!
The finished wave pattern base.  Notice that the waves all point outwards at an angle to represent the water displacement
The wake of the Dunerider is blown into two by the rear facing fans
This is the base after firing.  It's now solid unlike the plastercine I used for Conga Blue, so it won't 'gak up' the mould.  I also sealed it with mod-podge to make sure it was extra strong as Sculpey is a little fragile on its own.

Making the mould

As I'd ordered a whole new batch of silicone, I could make a nice deep mould for the waves so I didn't have to worry about reinforcing it with anything else.  Although this made the process far more expensive, it saved me a lot of niggles, so was ultimately worth it.

I started by drawing round the waves to get the rough size on a piece of 3mm foamex
I used foamex for the base and mould because it's strong enough to hold the silicone but could be snapped off when the mould had cured 
I cut out the base and bevelled the edges to mimic a normal miniature base
I glued the waves to the base, then glued that to another section of the foamex which would form the base of the mould
I then went around the entire wave pattern sealing every gap and hole with putty, tidying it all up so that no silicone could bleed under the base
I tidied up a could of the waves during this process using procreate putty which you can just make out (its also grey)
One final test fitting while the putty cured to make sure that it all still fit together
Next I built the first two mould walls with foamex.  The triangular supports were stuck on in advance to make sure that they were at exactly 90 degrees when I glued them.  Super glue sticks foamex immediately, so I wasn't taking any chances!
Once I was happy with the two end walls, I cut the side walls and made sure that they sat nice and level 
Once I was happy that everything fit, I glued it all together.  No going back now!
I reinforced the corners with more foamex and also sloshed thin superglue around the bottom joints to make sure that they were all waterproof
3 silcone pours later (about 800 grams of it!) and I was done
I kept the plastic mixing pot with the curing mould so that I could tell when it was ready without having to poke at it
Just for good measure, I filled the last 20% of the mould with plaster because I wanted to make sure it sat level for receiving the resin as it's only just slightly more viscous than water and would leave me with a wonky base if it wasn't level 

De-moulding

I didn't bother photographing the resin pour or the de-moulding process as frankly, they were dull and I just wanted to get it done!  The short story is that it all went to plan and the mould worked perfectly!

Test fitting

So, as part of the process of building the Blowfish, I added two flat bar magnets to the underside so that I could attach it to the base for display but still be able to remove it if I wanted to
It really does look like it's skimming the surface!
You can just see one of the two transparent flight stands holding up the craft from this low angle
The wave pattern works brilliantly with the twin turbines when viewed from above!
The crew of the Blowfish are servitors rather than Skitarii - I made these guys to be poking giant harpoon launchers through the stubber ports
I cut channels in the servitor's feet so that I could add small lengths of metal paperclip, meaning that both servitors stick to the magnets cunningly placed under the hull exactly where their feet would be on the deck.  How's that for efficient use of magnets?!
You can see the bar magnets under the Blowfish.  These connect to two transparent posts which I made from acrylic flight stands with square metal nuts glued to the top.  Once I was happy with the positions, I drilled into the resin, planted the posts and used clear UV resin to encase them.  They're effectively part of the base now, with each nut fully encased then sanded for a nice flat surface for the magnets to grip onto
And that's all of my progress with the Blowfish for now.  Once I've painted the bottom of the base with dark blue, I will be adding some frothy white water and slightly exaggerating some of the waves with clear medium.  Then I'll finally be ready to paint the Dunerider and crew!  I can't wait to see this project finished along with my two remaining knights and their Skitarii cohort!

Out for a stroll

In a previous post, I showed you two of my Knight Scion pilots from the Court of The Fisher King.  Now I've finished a few more, meaning I only have five more to paint before every member of the Court is represented in miniature form outside of their knights!

'Mad' Baron Pellionore - Pilot of Questoris Knight Magaera DeepDive
Driven mad by his extended exposure to DeepDive's machine spirit, Baron Pellinore is rarely seen oustide of his knight armour and no living soul can claim to have seen the face which he hides behind his bearded helm


Derrin Pike - Pilot of Armiger Helverin Knight Trench-Runner
Jovial and well liked by the other members of the Court, Derrin Pike prefers the small, nimble Helverin class knight despite having been offered his pick of the King's armoury


Ivraine Hiralden - Pilot of Armiger Warglaive Knight Tidebreaker
Ivraine is the daughter of Count-Octillus and has a fearsome reputation as a close quarters combatant whether inside or out of her Knight armour.  She also has a reputation with Corbenic's chief Sacristan Nautolex for constantly pranking the fusty old Techpriest after he unwisely described her battle tactics as 'reckless' while repairing her damaged Knight