As my 2020 blog entries were a little light on giant monsters, I decided to kick off my 2021 blogging with a nice package of Kaiju goodness!
King of the Monsters
 |
| The mighty Godzilla dwarfs a nearby blue whale |
Anyone who knows me at all will tell you that I love Godzilla and I'm lucky enough to have a son who's now old enough to appreciate the big guy too!
For his birthday, I decided to make him a display piece for his new bedroom using reclaimed wood from the shelves I recently took down in his old room. I settled on a bookend / nightlight and went to work!
One of the most iconic scenes in Godzilla King of the Monsters was his underwater investigation of Monarch's deep sea facility. I wanted to mimic this with a swimming Godzilla moving through an underground cavern beneath the ocean.
As always, I started with some sketches to help me work out the most important aspects that I wanted to capture. I found it surprisingly difficult to find any decent reference pictures of the modern Godzilla swimming. Although it wasn't an exact match, I used images of marine iguanas to help me understand the body shape of an aquatic reptile.
 |
| Sketching always helps me immerse myself in the subject |
Early on, I also decided that I needed to show Godzilla with something else, giving some context to reinforce his size so that it didn't just end up looking like a swimming lizard. For this, I settled on a blue whale swimming nearby, so I also researched the relative size of the two creatures to help me get a realistic representation of both.
The sculpt itself was fairly conventional, with a wire frame and layers of putty to form the core shape. I built up the basic musculature over a few sessions - I didn't have a lot of time for this and had to work quickly and keep it secret from my son!
 |
| Godzilla does look very odd without his scales and spines... |
 |
| A swimming posture is quite different from a standing one; the most important thing being the straighter upper spine |
 |
| Lizards swim by flicking their body and tail from side to side in a smooth motion. From above, you can see that Godzilla is in an S shape because of this movement |
 |
| The next stage was to add scales and plates to Godzilla's body |
 |
| I attempted to sculpt the dorsal spines, but found that the putty wasn't stiff enough to hold the shape |
 |
| I chose to carve the tiny spines from styrene (5mm X 1mm strip). Although it took me a couple of hours to carve enough for Godzilla's three rows of spines, it was worth the effort |
 |
| The first couple of rows were glued in place - you can also see the tiny blue whale I sculpted near Godzilla's tail |
 |
| I achieved a far greater height with styrene than I could have with putty of this thickness |
 |
| Once the third row of spines was in place. After this photo was taken, I finished off a few details and then added texture to the spines with more putty. Unfortunately I didn't take any pictures of that stage! |
 |
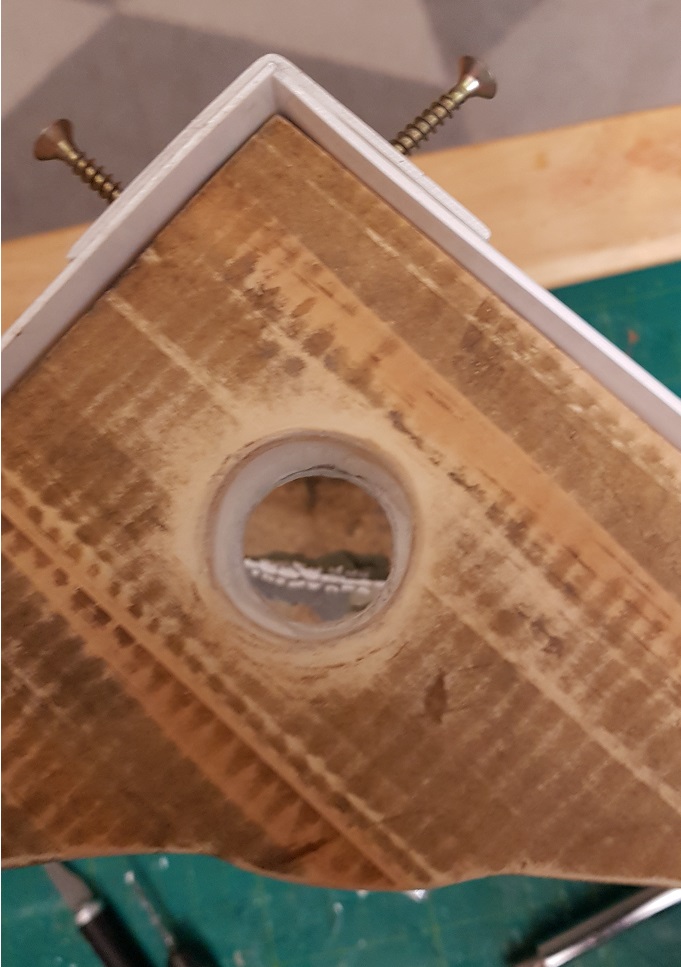
| Construction of the wooden elements was straightforward. As I wanted it to be a corner piece, I simply prepared two sections of reclaimed wood and cut them into a pleasing triangle shape with the long edge bevelled. I also cut a hole for the light to be installed in the top piece the screwed the styrene mould walls in place to test the setup |
 |
| As you can see, I textured the seabed and cavern top then set everything up to test before painting |
 |
| I was pleased with the overall look, so marked everything up, removed the temporary wire supports from the miniatures and prepared for painting! |
 |
| I masked the wood on the top and bottom sections before painting as I wanted a natural varnished wood rather than painting it |
 |
| The top and bottom sections were both painted by hand as I didn't want thin spray paint seeing into the wood, nor solvents introduced to the pieces which would be encased in resin |
 |
| The cave roof with a circular cut-out for the small LED torch I would be adding |
 |
| The sea bed was painted in basic colours as I would be tinting the clear resin blue and I knew that only high contrast details would show up |
 |
| Godzilla and the whale also received a high contrast paint job as any subtlety would be obscured by the resin tint. I added blue UV paint to Godzilla's spines and eye as this would help them stand out under low light |
 |
| Once painted and sealed, everything was re-assembled and prepared for the first resin pour. I used hot glue to ensure a tight waterproof seal |
 |
| This picture was taken after the second pour. The first was deliberately a little darker to simulate the deep water stretching off into the distance. The second and third were lighter in colour and less opaque |
 |
| After the third polyester resin pour, it was starting to come together. At this stage, it looks a bit cloudy and uneven, but there's a lot of cleanup and sanding to get a glass finish |
 |
| With the light on, you can start to see some of the surface imperfections. The majority of these would buff out |
 |
| Annoyingly, the blue whale detached from his stand on the second pour and sank too far down into the mixture for me to retrieve it without destroying the resin which was already cured to the gel stage |
 |
| Luckily I was able to remove the whale stand and he was still perfectly visible from both the front and back. This pictures from the rear shows what happens when you have gapping between the layers in different pours (far left edge). It looks like a crack, but it's a very thin air pocket running down the side. I filled most of it with clear UV resin and sanded most of it away |
I didn't document the sanding process for many reasons. There are so many videos out there telling you how to do it. Essentially, you go from coarse grit sand paper (I.e. 100) up to the finest grit (I finished at 1500 grit then went to a polishing compound), then buff to a glass finish. It's a hot, messy process which covers you in resin slop (you have to wet sand it to achieve a good finish) and you need to wear a face mask throughout as inhaling resin is extremely bad for you.
Suffice to say, I didn't want the process to take any longer than necessary and I didn't want to have to stop and clean myself up before taking pictures. In the end, it took me about 5 hours of solid dry, then wet sanding followed by polishing and buffing as I ended up repeating the whole process due to surface issues with the resin. Polyester resin sometimes forms a waxy coating on the surface which doesn't cure. It's basically a discharge from the resin and I had to re-sand the whole surface when some more bled through. The horribly sticky coating can ruin clothes and emits horrendous fumes, so I couldn't avoid treating it.
Despite polyester resin being great for this job, I think I will try epoxy next time as the fumes alone make working with polyester resins tricky. I'd advise people only to use it if they have access to a room with proper air extraction which will remain at room temperature or above during the curing process (which is anything from 24 - 72 hours depending on temperature).
Anyway, this project took me over a month to complete, but I'm pleased to say my son was over the moon with it, so mission accomplished! On with the pictures!
 |
| I varnished the wood once I'd finished the resin work, then sealed the resin as well. I'm very pleased with the final product |
 |
| Although I filled and sanded out most of the surface imperfections, a few were just too deep to resolve without drilling it out and re-pouring. I settled for the middle ground and just filled it so that the surface was smooth as glass. The striations and divots are only really visible from the back and you can't actually feel them when touching the surface |
 |
| The final piece looks great lit up at night! |
Lord of the Rats!
In 2019 I started work on a brand new sculpture; a Gloomspite creature for Age of Sigmar which I call a Dankhold Colossus. This beast was intended to be ridden by a mighty Dankhold Troggboss, forming a giant centrepiece model for my Troggherd. I got a fair way through the sculpt but for one reason or another, I got frustrated with it and mothballed the project.
I had a few different ideas around the creatures physiology, but what I really wanted to do was combine some of the existing troll qualities and dial it up to something quite extreme. I wanted it to have the following qualities:
Big and dumb as a brick
Distorted, almost sleepy features (it is a mount, so shouldn't look to sentient-looking)
Huge crushing fists, long arms and short legs
A big fat belly
Asymmetrical / twisted posture and rubbery skin like a Dankhold Troggoth
Rocky scales / protuberances like a Rockgut Troggoth
Mossy hair / fur like a Fellwater Troggoth
Lots of fungal growths
 |
| I want the underside of this beast to be 'hairy' with moss and fungal growths |
 |
| I wanted the face to be a distorted collection of tusk-like teeth and heavy, blocky features |
 |
| Evolution of the face from the front. I started by blocking out the features, then slowly refined them. Once I was happy with the facial features, I added fun details like rocky scales, fungi and a mossy beard |
 |
| When working with sculpey, it really helps to block out the features then look at it from all angles so you can get the form correct before the first firing |
 |
From the sides you can see the stalactites I added to the underside of the monster's chin. I intend to carry on this particular feature on the underside of the body too
|
 |
| The body started out looking a bit like a plucked chicken |
 |
| Once I had a basic shape worked out, I fired the body so it was easier to handle without denting it |
 |
My original idea for the rider was to have him mounted on a rocky throne up on the back of the model
|
 |
| The rocky throne was sculpted separately, from the Colossus. I think that's why I found it so hard to make it work naturally with the Colossus. The throne has now been shelved, but I will undoubtedly find a use for it in a future project! |
 |
| I added clay dimples over the surface of the back and upper arms - these would form the basis of the rocky scales. At this stage, I could start to gauge how the scale pattern would look |
 |
| I decided that the scales would inhibit movement too much over the shoulders, so I reduced them significantly |
 |
| I managed to hit a happy medium with craggy and rubbery on the skin. At this stage, it was still just test textures on patches, but I liked how this layer looked |
 |
| This was the point I got to when I decided that things just weren't working out the way I wanted |
After a year in stasis (a box in the garage), I finally decided to resurrect the model and get it finished. After a lot of pondering, I decided that the main things which weren't right were the length of the neck, the throne which just wouldn't look right however it was positioned, and the fact that I hadn't yet constructed the rest of the body, so it was impossible to work out issues with the overall look of the model.
First up, I had to fix the neck - after a fair amount of measuring and marking up, I took a hacksaw to the neck, then carved it to make it fit the head correctly.
 |
| I used some superglue and baking powder to stick the head in place then roughly filled the gap with sculpey |
 |
| I didn't worry too much about the seam as I needed to do a lot of work on the body anyway |
 |
| All things considered, the join was actually pretty good |
 |
| Next, I started on the second arm - I made a wire armature and bulked it out with baking foil. I then coated the armature with firm sculpey so that it was nice and solid. This would allow me to make the leg armature without deforming the arm |
 |
| This is where I currently am with the sculpt. The basic structure is now looking the way I had envisaged it. The lower legs and forearms require more bulking, as does the belly and chest. The Rockgut next to him should give you a pretty good idea of how large this creature is! |
 |
| The beast is pretty imposing on his own - I can't wait to see him with a Troggboss rider! |
 |
| The left hand will be resting on the top of his thigh, making him appear lopsided and twisted - perfect for a troll! |

|
Here's a better view of the WIP Rockgut Troggoth above - he's the test for the colour scheme I've settled on for my Rockguts. I still have to finish the cloth - I think his loincloth and bindings will end up being red or green to add a bit of contrast
|
And finally, some kit-bashed beasties...
Just before Christmas, a friend asked me if I had any ideas on how to make some Chaos spawn out of his Tzaangor Enlightened spares. Rising to the challenge, I clipped all of the spare parts off the sprues, had a good rummage through my own bits boxes and threw together some hideous creatures!
I wanted to get these minis turned around fast, so I gave myself 3 evenings to build them and 3 more evenings to get them painted. As they needed to fit in with my friend's army, they would all have to be themed around Tzaangors, so I decided to make sure that even though they were spawn, they all had to look like they were a member of the army being punished / rewarded by Tzeentch. Here's what I came up with!
The Maw
 |
| This poor Tzaangor has literally been torn open by a huge bloody maw ripping its way out of his chest. |
 |
| The intention with this miniature was to make something like The Thing; a ravenous, predatory creature which skitters forward on spiny feet, messily devouring anything in front of it! |
 |
| You can see the beast man's broken form atop the fleshy maw, with his skeletal legs trailing behind, still attached by the spine... |
 |
| A glistening set of inner jaws wait to hungrily swallow down its prey |
 |
| From above, it looks like the huge meat monster is literally exploding its way out of the tattered Tzaangor - his twitching pink tongue makes me chuckle |
Eye guy
 |
| I think eye guy is my favourite of the four spawn. I like the writhing, inhuman form; like some kind of tentacled monstrosity from Lovecraftian horror. All that's left of this disciple of Tzeentch is his skull and bones, reformed into a hideous fleshy portal for unspeakable horrors to reach through and drag their screaming prey back through to the realm of chaos... |
 |
| The sheer horror of the ground based disc birthing a second disc on more fleshy tendrils, itself in turn appearing to be messily ejecting yet another, could represent an endless cycle of monstrous replication as the thing slurps its way across the ground, sucking up in either or both directions only to birth more tentacles seconds later... |
 |
| Again, I used a disc of Tzeentch for the insectile base of the model, but this one is distinctly different from the first |
 |
| I love the sense of movement and flow you get when looking at this thing from the side. You can almost see the tentacles writhing and whipping in loops and lashes |
 |
| From above it looks like intestinal offal. Delicious! |
Mouthipede
 |
| This revolting beast poses a brilliantly horrific question. Which end is the mouth, and which is the... bottom end? Just let that question sink in. Either way round, Tzeentch has REALLY punished this Tzaangor. |
 |
| Head bum? |
 |
| Or bum head? |
 |
| If you hadn't yet realised, the Tzaangor's original head is at one end of this vile creature |
 |
| I had to make a special base for this creature. |
 |
| I swear the shape of the base was accidental. |
The Flensed
 |
| The final spawn was the most complex in its construction and required a bit of pinning and sculpting to get the result I wanted, which was magical fire literally annihilating this Tzaangor from the inside out |
 |
| From the front, you can see the flesh of the chest literally sloughing off down the front of his exposed ribcage |
 |
| The magical fire is forming an effigy of a Tzeentchian servant |
 |
| From the rear, you can better see the screaming faces trapped within the magical plume and the exposed spine poking from the slab of meat which has been violently thrown backwards as the beastman literally explodes! |
And on that note, let's hope 2021 is a better year for all! Stay safe!


Wow! That's like at least three blog posts all rolled into one.
ReplyDeleteI love the Godzilla piece! It was only a question until you did a Godzilla miniature. The scuplt is very cool in and of itself. I think you nailed the swiming pose! A very cool piece indeed!
The Verminlord is also a very cool model, ForgeWorld does have some great sculptors working for them. The hairs you added make him look like a very nasty rat! And its always great to finish a project.
And of course the Dankhold Colossus is simply exquisite! I love his pose with the lanky limbs and bend back. He's going to be immens! I'm looking forward to see what you do with him next.
The spawns also look like a nice and creative way to spend a few evenings!
Thanks Xarf! I saved up a few posts over December as I wanted to concentrate on enjoying Christmas with the kids; now I'm back in full swing, I should be posting updates every week or two :)
Delete82 photos... pure hobby gold. You are very talented Mr Lee. Can’t help thinking we are missing an Imperator update though ;) haha. Great series of beasties, love the spawn, could easily see them on a battlefield with hordes of Chaos.
ReplyDeleteThere will be an Imperator update at some point - unfortunately I had to pack it all away for Christmas as it was occupying the space reserved for the tree! I don't think Mrs G. would be fooled by a titan covered in tinsel!
DeleteYour sculpts are fantastic. I need to test out my new sculpting tools, but haven't decided on where to start.
ReplyDeleteI also love the hairy Skaven. One of my favorite fantasy armies made to look so gross.