Things can only get better right?
Every now and again I like to take a short break from my bigger projects to give me a break. It gives me some time to ponder any issues I'm facing while still doing something productive rather than keep bashing away at the same model until I can't face working on it!
My boss helpfully gave me one such project project when he decided to adopt the Dumpster Fire meme as our team mascot:
 |
| I'm not sure of the artist, but this is the original image which inspired my project |
This was enough of an excuse for me to make my boss a physical mascot!
The Build
I started by making the basic box shape from Foamex - this was pretty straightforward, so I didn't bother taking pictures of the process. The only thing I'll note is that when you're building with any any material, don't forget to take the sheet depth into account and plan the assembly when cutting the components otherwise you'll end up with under or overlapping edges!
Once the basic shape was done, I cut a hole in the base plate for the tealight to be installed (I would later adjust the size and shape of the hole, but it's easier to do this with a place to start).
I made the wheels from three plastic counters (one slightly smaller for the middle) sandwiched together. I pre-sanded all three before gluing them together to improve adhesion - this is important with hard plastics as you can't using normal poly bonding cements. I drilled a hole through the centre of each wheel then cut four two-piece legs - I glued a small plastic rivet to the inside of each leg piece so that the wheels would pop into place once the legs were glued to the base, holding the wheels in place while allowing them to spin freely.
 |
| Now with extra rolley wheels! |
I had already decided to make the two bine lids open up, so constructed two tiny hinges from multiple sections of styrene tubing. It's always fiddly assembling plastic hinges as you have to avoid glue getting into them! My advice is the pre-assemble the non-moving parts in advance, then very carefully glue the sub-assemblies together with fast drying gel super glue and a cocktail stick to avoid capilliary action drawing the glue into the joint!
 |
| I added the rib detailing on the outside with an embossing tool and ruler as Foamex takes indentation really well |
 |
| The lids with the tiny hinges in place. I made the little handles from a Foamex rectangle on top of two cubes sanded into a more attractive curve shape |
 |
| I used some mis-cast resin components from my box of Imperator spares to make the handles in the side - Once they were cut down and sanded, the imperfections didn't matter! |
 |
| Skippy with his brand new face! |
 |
| The lip around the rim was intentionally larger than the lids to make sure that they wouldn't fall through the gap when closed. Sounds obvious, but it's always the simple things that catch you out! |
The finished Mascot!
After painting, I made some fake bin-bags and general rubbish to fill Skippy's tummy. These were made from (clean!) dog-poo bags with a paper and crimped plastic filling.
 |
| The slightly transparent plastic was perfect for the bin bags! They were tied up at the top like real bin bags |
 |
| In the end, I glued the fiery side lid open as it was stressing the coloured fire acetate opening and closing it. The other side still opens and closes quite happily though! |
 |
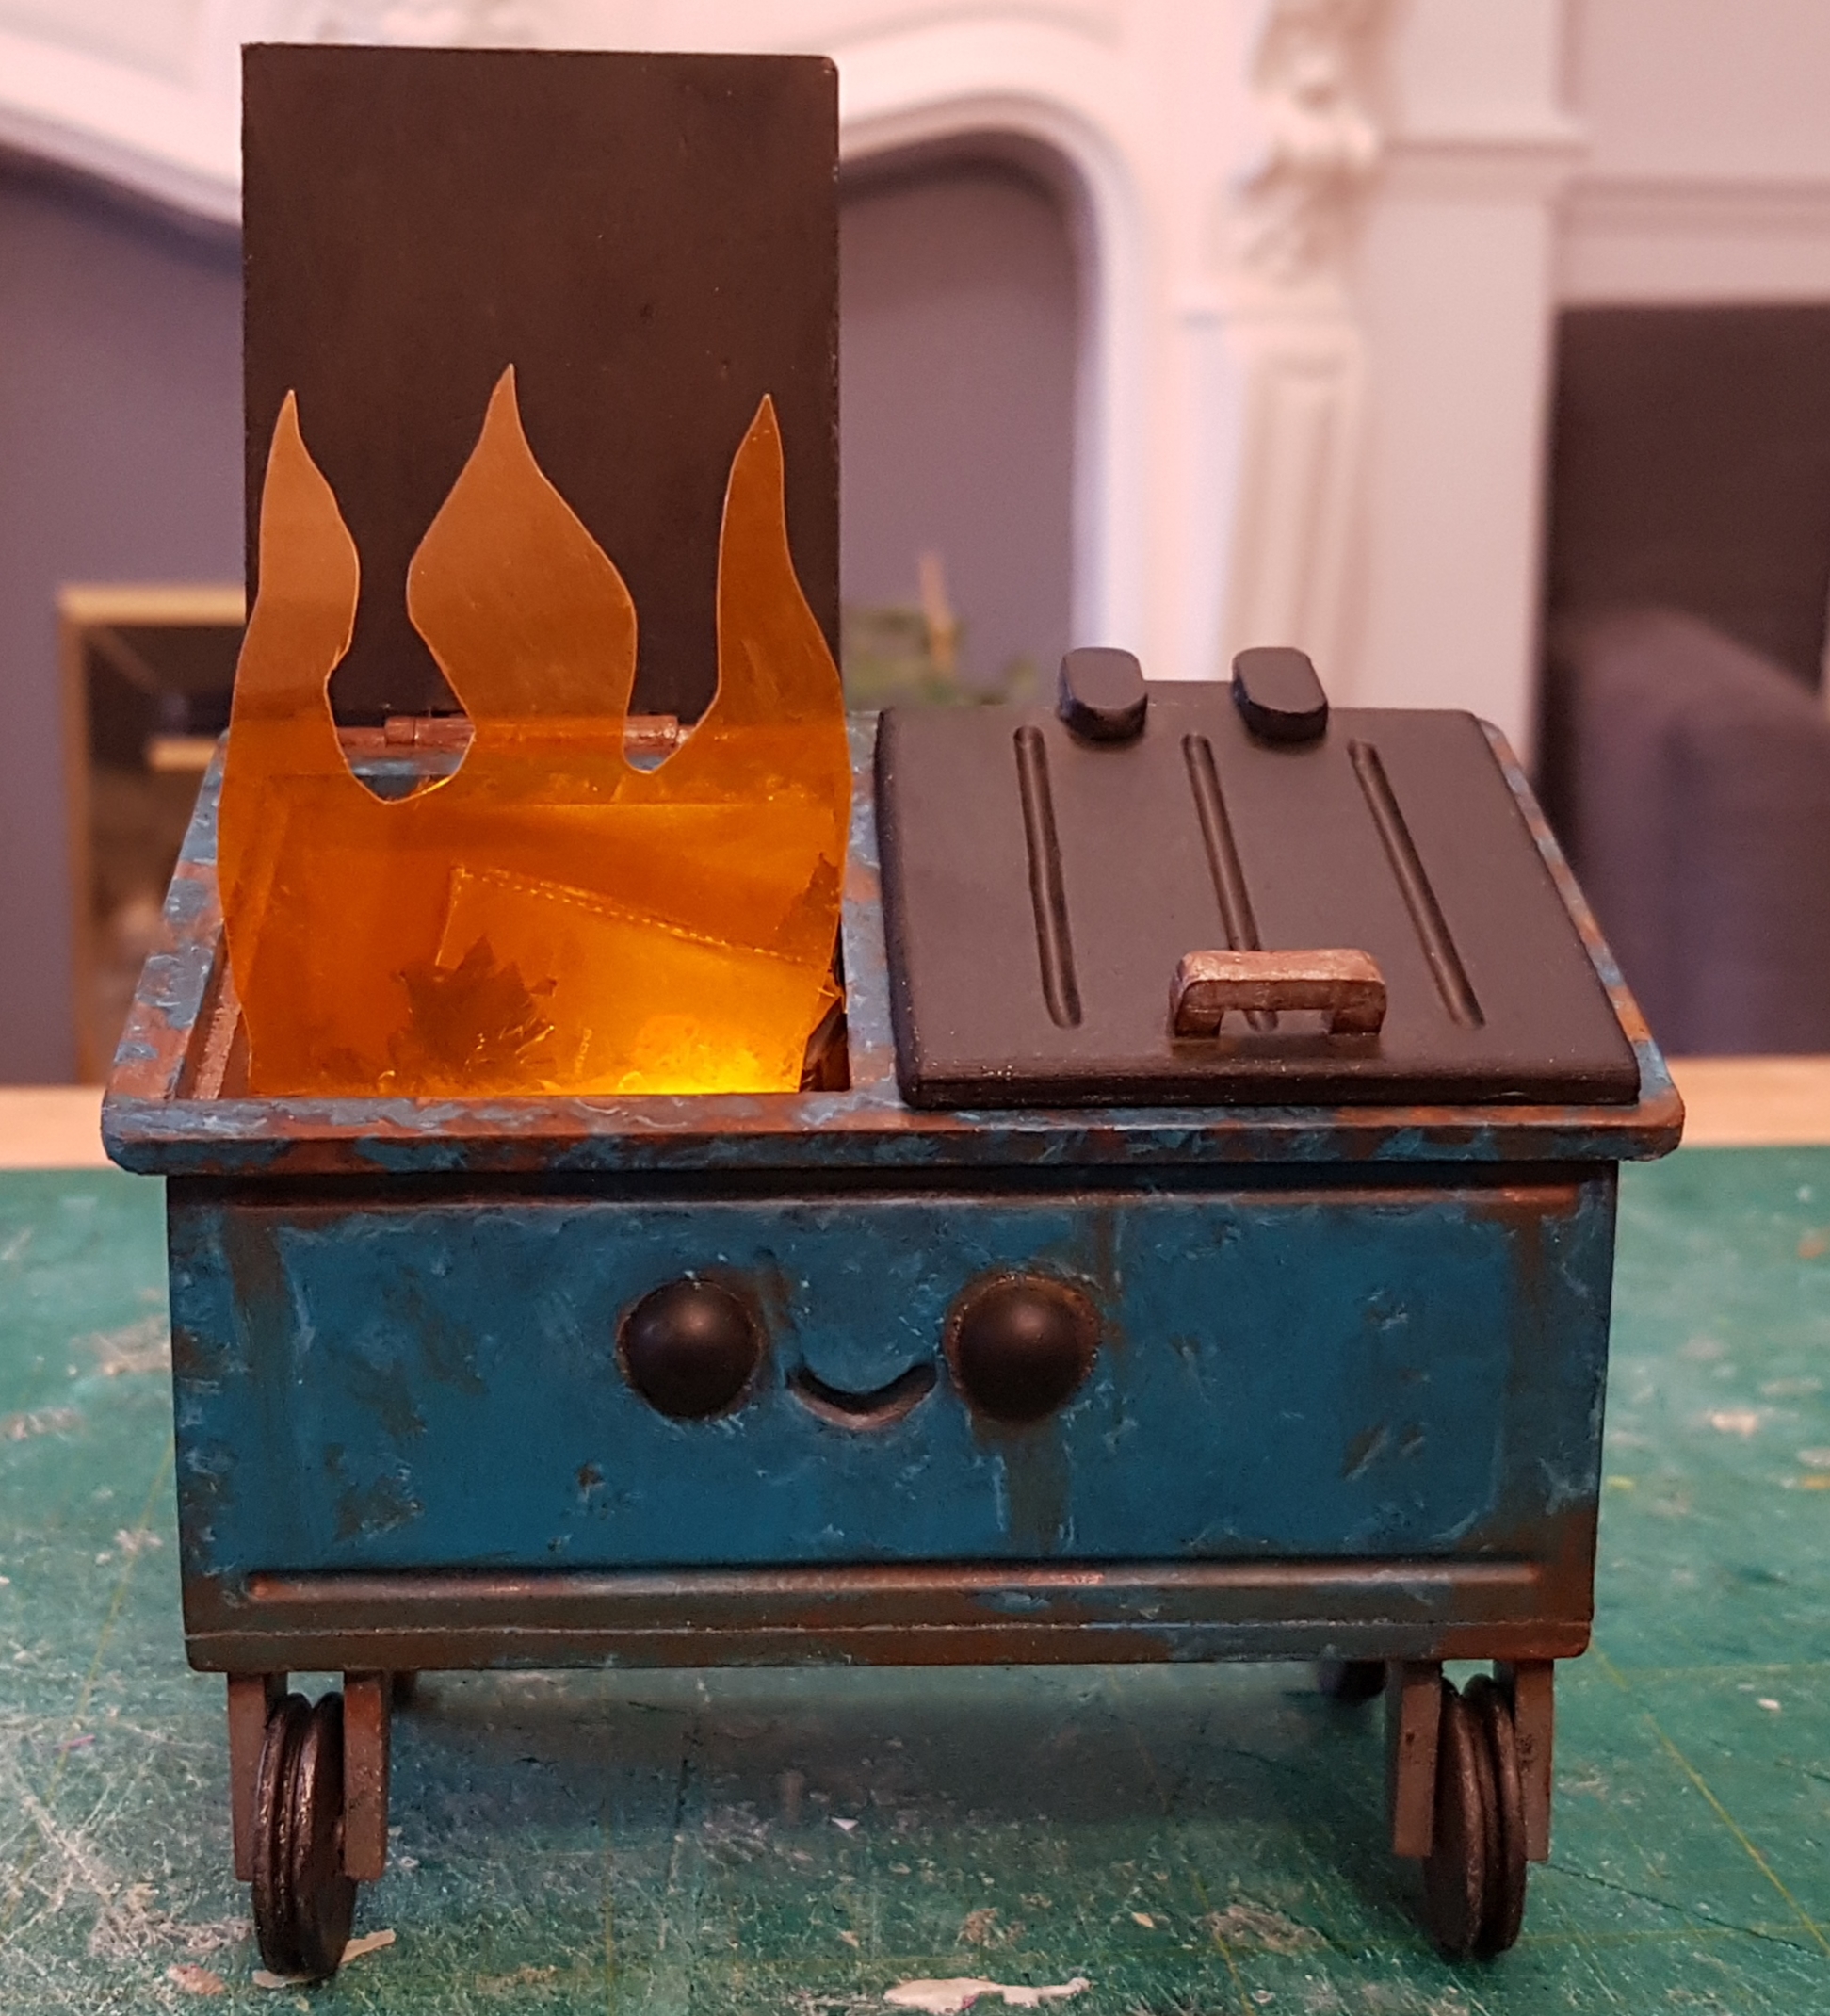
| The tealight flickers like a real burning dumpster! |
 |
| Rusty and hot - just the way I like my trash cans! |
 |
| Skippy wouldn't be complete without some graffiti - 'This is fine...' |
 |
| I really enjoyed making the mini rubbish - different bags, fish bones, an apple core, banana skin and pizza box were all made to decorate the interior and camouflage the tealight |
 |
| The light switch and hole to replace his battery |
 |
| Someone has helpfully scrawled his name on the side |
 |
| And that's all folks! |


Ha ha! This made my day.
ReplyDeleteHa! Glad to be of service! :)
DeleteLove a good dumbster fire!
ReplyDeleteBut in all earnest: that rust is just the best! Love what you did with a pretty much flat surface.
Thanks man - perfected rust process on the Fisher King Knights! Top tip - stipple on a little typhus corrosion here and there before adding a reddy-orange as it adds some nice texture like disintegrating metal!
Delete