Stupidly hungry or hungrily stupid?
 |
| My herd of Troggoths - growing in size if not in intellect |
My Troggherd has been stowed away for months while I've been working on various Knight and Titan projects. With the advent of Age of Sigmar 3rd edition, I decided it was high time that I dusted off these big idiots and got them ready for the field of battle!
I've now completed several units and have only my Dankhold Troggoths to finish! I've included the Troggoth Hag WIP images at the end of the post for anyone that's in interested in how I put her together.
Mollog
Unfortunately, I completely forgot to include Mollog with my group pictures, so here he is with his coalition of squig buddies - just super impose him with your mind... :)
 |
| Mollog surveys the currently vacant Trogg Throne. Who could possibly sit here? |
Fellwater Troggoths
I finally finished painting the unit of six Fellwater Troggoths which I started over a year ago with a single test model. I'm very pleased with the final colour scheme!
 |
| Smelly, ugly and stupid - these guys are a real triple threat! |
 |
| I kept the colours a little muted as these trolls are supposed to be cave dwellers |
 |
| The troll vomit is still one of my favourite parts of this kit! |
 |
| The bases all have a similar cave theme across the herd |
 |
| Bleurgh!! |
Fellwater Troggoth Hag
 |
| A Fellwater Troggoth of gargantuan size is a foe to be reckoned with... |
I'd been planning to add a Troggoth Hag to my army for some time, but wasn't 100% sold on the Forgeworld version. Besides, this would give me yet another opportunity to convert a miniature and I never shy away from a challenge!
In the end, I decided to use a plastic Great unclean one miniature as the basis for my Hag. I love the basic model and it had the lumbering proportions that I wanted for my smelly lady of the bog!
 |
| As hideous as she is potent, my Troggoth Hag stands taller even than the herd's giant! |
 |
| No Hag would be complete without a sack of stinking bones, junk and foetid meat |
 |
| All manner of junk is contained within the hag's net |
 |
| Note how the bra rope pulls into her fleshy back |
 |
| I was particularly pleased with the sail and scales on the hag's back |
 |
| With spindly chin hairs, a glowing lure, and even a crown on one tusk, the hag is a real beauty |
 |
The hag's staff is hung with many scavenged trinkets
|
 |
| The rancid cave pools on my Troggoth bases gave me an opportunity to add a little extra character! |
 |
| Towering over her Fellwater charges, the hag fits right in! |
 |
| I used a very similar colour scheme on the hag as I wanted the lineage to be obvious |
 |
| I'm very much looking forward to using these guys in a game! |
 |
| One big smelly family! |
Rockgut Troggoths
 |
| Time to rock. |
Rockgut Troggoths are pretty much the mainstay of most herds - they're tough as nails and pretty nasty when fielded in large groups. I have nine Rockguts which I intend to run as either one large unit or a group of three and six for more flexibility.
As far as the kit itself goes, it's an absolute joy. I used most of the options from the three kits I had to make nine very individual and characterful models. I think you could easily squeeze twelve models out of four kits without any of them looking the same! That's a huge amount of variation for a set containing only three miniatures! The heads alone gave so many options that not one of them is repeated in my collection!
Rather than going with the traditional blue, I wanted to try out a really sandy yellow scheme for my Rockguts. I complimented the yellowy skin with orange around the faces, then added spot colours on weapons and crystals to contrast. Overall, I am very happy with how they turned out!
 |
| It's testament to the variety of the kit that not one of these Troggoths look the same |
 |
| Catch dis! |
 |
| The contrasting green crystal in this guy's rock works nicely |
 |
| I love this face - quizzical, confused, pondering? Who can say? |
 |
| I used a spare Dankhold Troggoth cannon necklace on this Rockgut - I think it works really well! |
 |
| Ready to bash out your brains with a stylish geode club |
 |
| This Rockgut has found some valuable realmstone - he'll probably throw it at someone. Or eat it. Maybe both. |
 |
| I really enjoyed painting these miniatures; particularly the crystal areas like the one on the end of his Trogg's club |
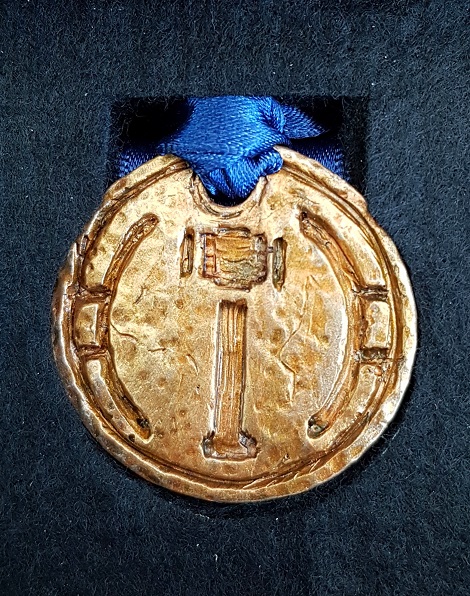
Fungoid Cave Shaman and Badmoon Marker
As Troggoths are not natural magic users, I decided to make myself a Fungoid Cave Shaman using an old Sourbreath Troll miniature in order to keep with the theme.
Although I don't intend to use it for its intended purpose, I painted up the Badmoon spell to use as a marker in the game to illustrate the position of the Badmoon as it changes position during the battle.
 |
| Chanting to the Badmoon, this Troggoth Shroomancer prepares to cast an undoubtedly pungent spell |
 |
| Endless spells such as the Badmoon are always fun to paint! |
Troggoth Aleguzzler Gargant
 |
| My Troggoth Gargant is like a walking forest of fungus! |
It would have been rude not to include an Aleguzzler Gargant in my Troggherd, but he needed to be 'Troggified' first! The conversion itself was pretty simple - I used most of a spare Dankhold Troggoth head, resculpted the neck to fit. I then enhanced the skin of the body to make it appear more wasted and flaccid as if sagging from the weight of all the fungal growths hanging from his body!
I added all manner of fungus, moss and toadstools to his skin to make him seem like a part of the very caves he inhabits! He also carries a club fashioned from an expired pet dragon, made entirely from parts included in the gargant kit!
Rather than the normal fleshy tones, I painted this ugly behemoth in pallid greens and blues to simulate the effects that living without sunlight would have on the skin.
 |
| Saggy of moob and belly, my gargant lumbers from his underground home |
 |
| Covered with a patchwork of cloth and fungal growths, this gargant could be mistaken for a pile of detritus while sleeping! |
 |
| There are even a couple of cloth patches made from Rockgut hide on my gargant! |
 |
| The dead dragon skull was clearly taken from a beloved pet as shown by the spiked collar hanging from the club's shaft |
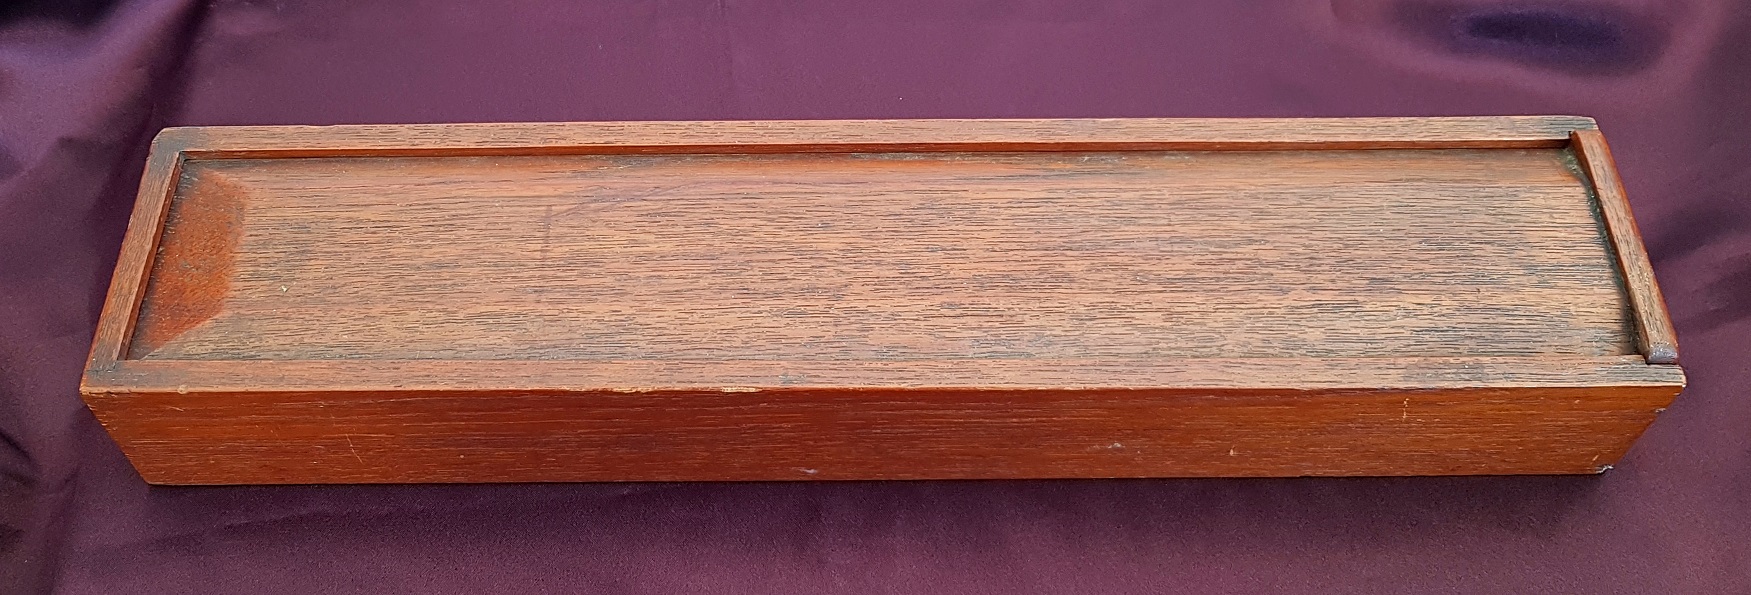
The Trogg King's Throne
 |
| The Trogg King's literal seat of power |
I wanted my Loonshrine to be related to my Troggoths rather than the badmoon itself, so I made a throne for the Trogg King (see more of him
here) using a Magewrath Throne scenery piece which I'd had squirrelled away for a while.
The throne itself is decorated with fungus and even a Stalagsquig, while one of the two statues has been smashed to pieces by a falling stalagtite from the cave ceiling. I was especially pleased with the Stalagtite chunks embedded in the ground next to the smashed statue, having even flipped up some of the surrounding flagstones!
The seat throne itself is covered in dubious brown stains, with the Trogg King's favourite bone (maybe his badge of office?) leaning against it. Skeletal remains lay nearby, while a trail of blood up the steps to the throne suggest that the Trogg King enjoys the occasional humanoid snack...
 |
| Clearly a reclaimed relic of a former empire, this throne lies deep within the Trogg King's underground caverns |
 |
| The smashed statue and upturned flagstones next to the fallen rocks add a little narrative to this piece of terrain |
 |
| I painted the throne as obsidian, heavily weathered and covered with colourful mushrooms! |
 |
| I look forward to being able to use this potent (pungent?) relic in a game! |
 |
| One of the Trogg King's unfortunate dinner guests |
 |
| Clearly not from Ikea |
All fungus great and small
 |
| Shroomy Hollow - a selection of fine Fungus and lair of the Shroomancer... |
To accompany my Troggoths, I created yet more fungal delights to act as scatter terrain. These were made to fit in with the Shroom Hovel (check it out
here), fleshing out the Shroomy Hollow themed terrain set I've been working on.
 |
| The new mushroom clusters |
 |
| I originally sculpted these two large toadstools to go on the Shroom Hovel base, but they proved a little large. I repurposed them as scatter terrain on their own base |
 |
| The base is also home to a number of smaller purple mushrooms |
 |
| Some smaller fungal clusters |
 |
| By the shape and colouring, you can see that these toadstools are all of the same species... |
 |
| ...even if the largest of their number has succumbed to rot and decay |
All together now!
 |
| The bases really tie my Troggoth menagerie together! |
 |
| The surly Rockguts lobbing boulders |
 |
| A clutch of Fellwaters vomiting corrosive bile |
 |
| What a handsome bunch! |
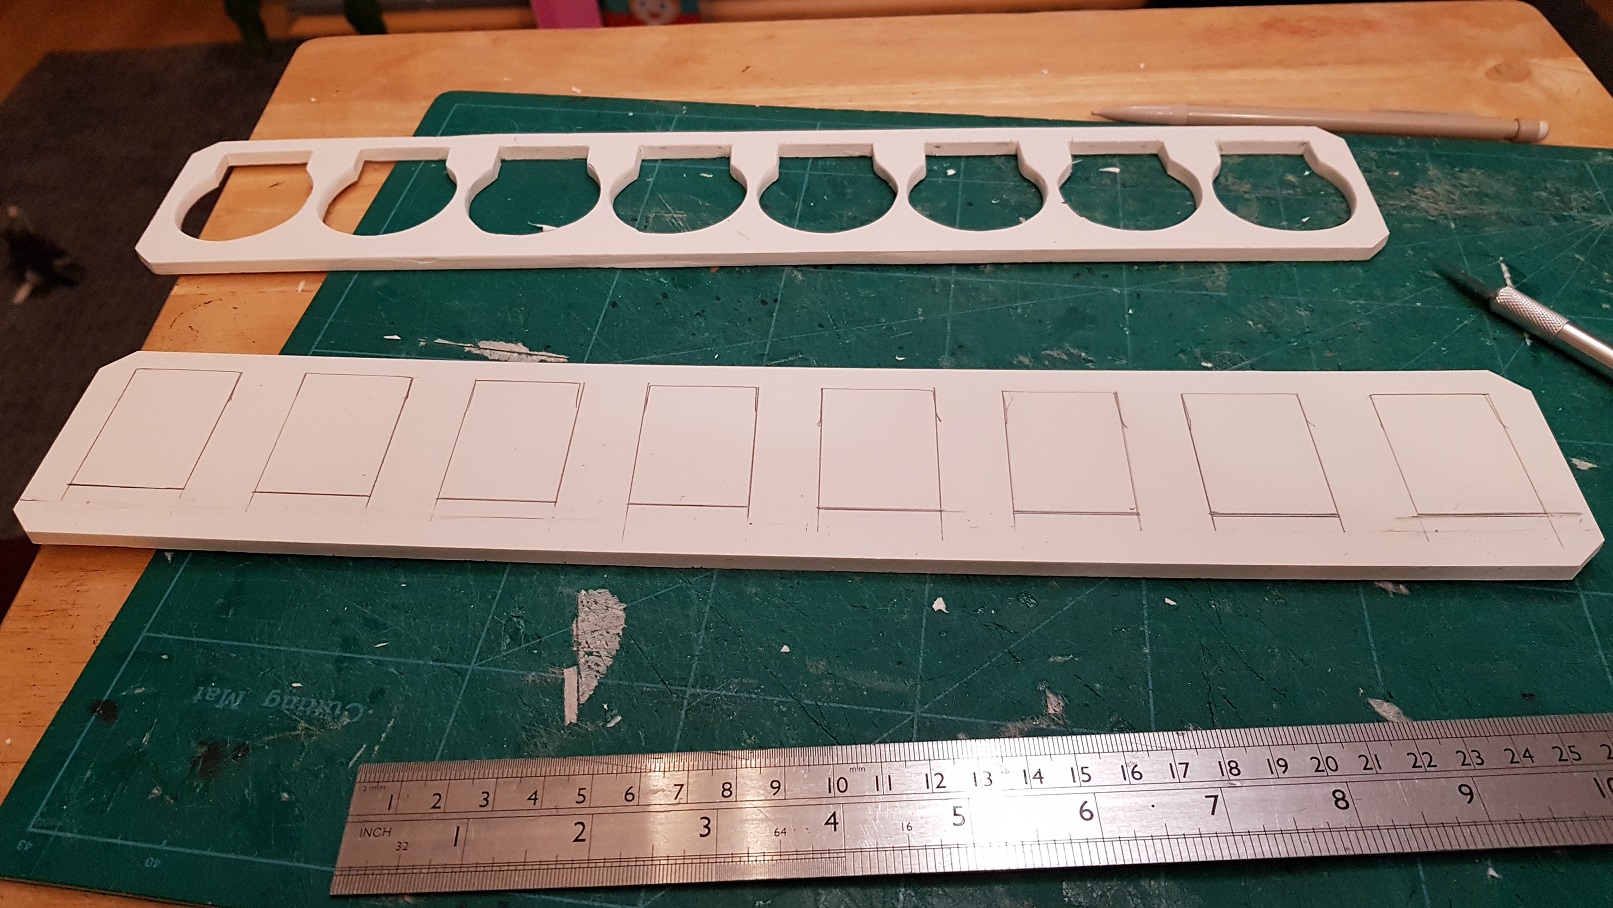
Making the Hag
As previously mentioned, The Troggoth Hag started off as a Great Unclean one plastic kit. I assembled the basic shape then carved off any large details like the spilling guts and toothed maws which would indicate this was a creature of the dark gods. I roughly filled all of the gaps this left with some basic epoxy putty.
 |
| The basic model all assembled, cleaned up and filled |
 |
| I started by lengthening the staff and sculpting protruding spines on the back - these would become the sail |
The observant of you will have noticed that I left the head blank as I would need to sculpt a new head from scratch. In order to get an idea of how I wanted it to look, I sketched out some ideas...
 |
| The final face took elements from a few of these sketches |
 |
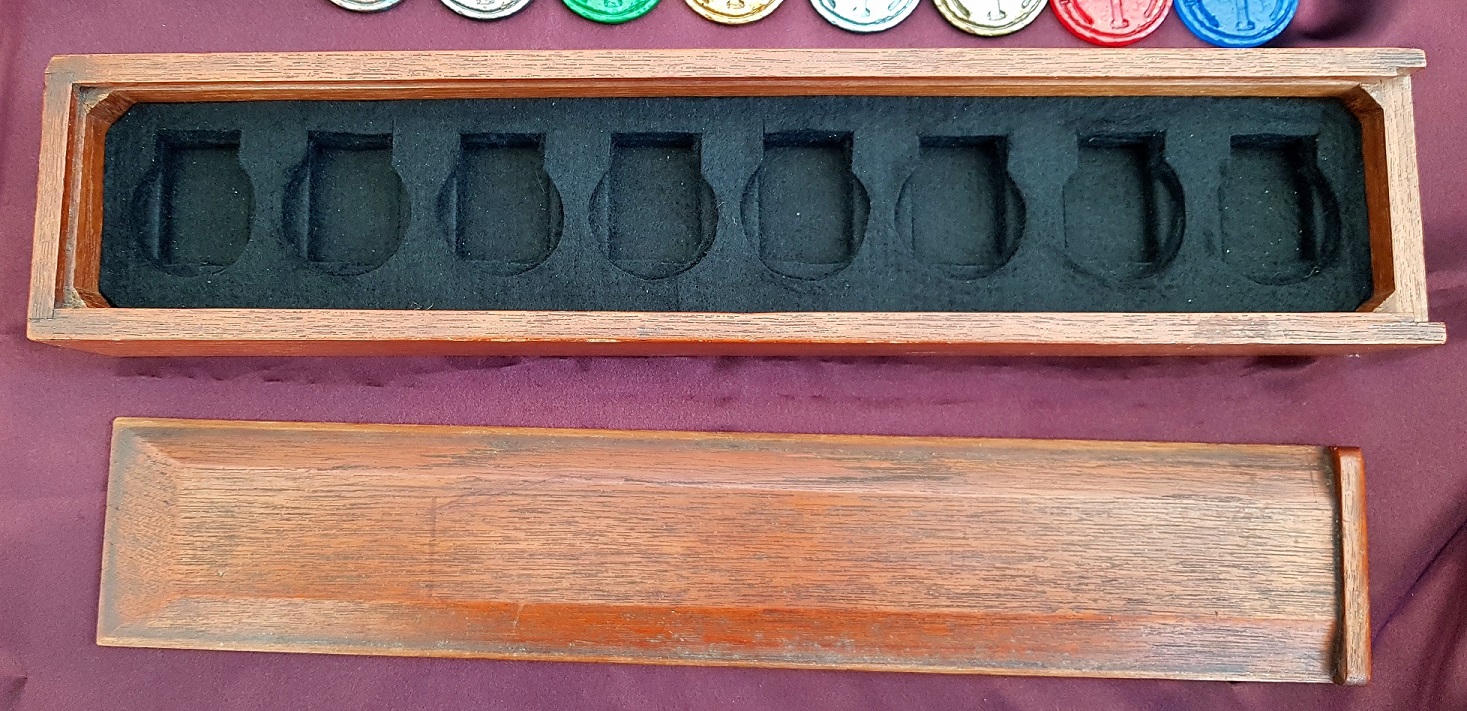
| While I had created the net's content from plastic components, the net itself was made from plaited string which I then made into a net by creating a knotted lattice. This took a whole evening, but I was very satisfied with the final look! |
 |
| I filled in the sail gaps and started to texture the skin areas which I'd filled |
 |
| I also wrapped the net around its contents and fixed it to the hag's back |
 |
| I love the tentacle hanging out of the net! The tentacle was actually a spare Necromunda marker |
 |
| When planning the miniature, I had deliberately selected the arm with the reverse gripped knife as the position made it perfect for convincingly carrying a sack! |
 |
| With the other main areas in place, I started work on the head |
 |
| I used aluminium wire for the ear and lure shapes, metal ball bearing for the eyes and carved plastic for here teeth |
 |
| Once I had the basic shape down, I went back to the face in several sessions, refining the details and adding extra features |
 |
| I sculpted a bra - even trolls can be modest! |
 |
| I started adding some hair and other details such as scales to the cheeks |
 |
| I removed the ear wire then sculpted them on a flat surface for ease. Once cured, I flipped them over and sculpted the backs before gluing them in place on either side of the head |
 |
| I sculpted the gross looking pools of slop onto the base after I'd worked out the Hag's final foot placement, creating ripples and bubbles in the surface |
 |
| And here is the final miniature! |
 |
| I think this was my fastest ever large miniature conversion, taking only two weeks from buying the kit to having it completely painted! |
Orthos - Cradle
And finally, I wanted to share a pencil drawing I did of a character called Orthos from the book series Cradle by Will Wight. I've worked my way through all nine of the available books on Audible and am eagerly awaiting the 10th entry in the series! I highly recommend the book series to anyone who likes intricately fashioned fantasy worlds, fantastically engaging characters and some genuine laugh out loud moments!
Orthos is one of the protagonists in the series; a huge sentient fire turtle possessed of a surly disposition and a huge reservoir of raw blackflame power. I was so taken with Orthos that I knew I had to draw him in detail! I even earned a nod from the author himself with my depiction! :)
 |
| Orthos in all his spikey glory! |
I was so pleased with the final result, that I have decided to scuplt Orthos - stay tuned for future updates on my progress!


