Today I wanted to focus on a few different subjects rather than just one...
First up... What's in the Box?!
 |
| The Box |
My sister and her family recently came over from Canada for a short visit. One of our days out took us to Nottingham for the annual Sherwood Forrest Robin Hood festival.
It was a great day out as you can see from the picture below which I took at the end of the 'Outlaw Hunt' which involved searching for Robin Hood and his incredibly well hidden men. We found Robin Hood in a bush, Will Scarlett
inside a tree and Maid Marrion with a fern on her head!
 |
The Sheriff was pleased with our Outlaw tracking skills, rewarding us each with a certificate.
Next time I'm asking for cash.
Up front. |
Anyway, as she was only with us for a few days, I wanted to give her, her husband and the kids something nice to take back to Canada with them. I instructed each of them to find a stick as I wanted to try out some new techniques to make them a nice little keepsake each.
'But how does that relate to the box?' you ask...
The simple answer is
WANDS!!
That's right, I made each of them a whittled 'Harry Potter' style wand and created a custom storage box for them!
I was pretty pleased with the overall result as a sort of display piece rather than having any really practical use.
The box was a basic softwood storage which I picked up a while ago. A light sand, some wood stain and a couple of coats of varnish later and it was ready for the lining which I made from sticky backed felt to protect the wands from the wooden surfaces.
I then carefully measured the inside rim of the box and stencilled the wand shapes onto a large piece of 10mm EVA foam. Once I'd cut it all out and covered it with a black priming agent, I glued it into the lid and main box recess. It's worth noting that I deliberately cut the foam slightly larger than the wands at the bottom (to allow for foam shrinkage when I heat sealed it) and smaller at the top to hold the wands in place.
Overall I think it worked pretty well and may well use the EVA foam again in the future for creating transport cut-outs for large miniature custom cases life the one I put together for my Reaver Titan. I wouldn't recommend this for small or delicate miniatures as the heat treatment and priming stiffens the foam to the point where it could damage intricate components.
Anyway, here's some more shots of the wands themselves...
 |
| White Witch Wand. Simple and Elegant. |
 |
| Carved and sanded smooth from an angled branch elbow then varnished after a white wash was applied. |
 |
| Dryad / Woodland Wand |
 |
| Carved from a simple branch with engraved flower and vine patterns etched into the surface. Coloured with acrylic washes in the engraved areas before varnishing. |
 |
| Practical Wizarding Wand. Stockier but carved to fit into the palm and forefinger. |
 |
| Again, carved from a single piece of wood with an etched Maple leaf and red leather inlaid stripes on the grip. |
 |
| Conical Mermaid Wand. My Niece adores mermaids and I adore her, so this was a no brainer. |
 |
| Once the stick pattern had been carved, I painstakingly adjust the shell and receiver on the wand to give a nice tight fit before it was glued into place. Simple clear varnish was used to seal it. |
While we're on the subject of random props...
I thought I'd show some pictures of a Cthulhu-esque Dungeon Master Mask which I created a while ago. The creation process was pretty straight forward.
I bought a basic pre-fabbed mask, added some texturing using paper maché and then after it had dried, I sculpted over the top with my usual bulk putty mixes (see my brood horror article for more mixing tips!). Following that, it was just painted and varnished as normal.
 |
| Basic shapes were built up on the surface before refining and sharpening them with files once the putty had cured. |
 |
| I blended the pattern with the texture I'd already applied to give a cohesive, organic look. I also tried to make it look like beaten metal rather than a forged piece of armour, which I think worked out really well! |
 |
| Painting and weathering was pretty quick. I applied a couple of layers of thick gloss varnish, polished the mask then applied a thin matt spray. The overall effect nicely simulated aged bronze. |
 |
| The finished piece - I think it has a really sinister look to it! |
 |
| Git outta moi dunjon! |
And finally...
I have been working on a Frost Giant conversion for a friend recently. Tom from the AoS Path to Glory campaign I'm taking part in collects Beastclaw Raiders and had a Mourngul miniature which he wasn't sure what to do with.
I had recently seen an excellent conversion over on the Exprofundis Blog (
http://www.exprofundis.com/frost-giants/) and was desperate to give it a go, but with a slightly different take on the idea.
The Frost Giant which I wanted to build for Tom would use the 'Incarnate Elemental of Fire' ruleset but replacing Fire with ice. To fit this, the Frost giant would need to be a part magical force of nature, hunting the desolate icelands in search of prey...
My idea was for a gigantic, wiry tracker, sniffing out its quarry in a squat pose, ready to spring up and lope off towards an unwary victim. Being partly magical, he would have a chill aura around his hands which he'd also use to fashion huge icy spears which could be thrown like a javelin to skewer a raging Thundertusk!
 |
| I assembled then painstakingly trimmed down the model leaving only what I required to fashion this colossal beast |
 |
| I used the size of the arms to calculate the rough length of the legs then created a frame from wire |
 |
| I quickly realised I was going to need a bigger base... |
 |
| Very rough putty 'bulking' was the first step in the process. |
 |
| I used enough putty to add bulk and solidify the wire frame, but not so much that it would interfere with the musculature which I would need to build up next. |
 |
| The Mourngul miniature has very odd musculature and proportions - although I was using my human anatomy books for reference, I had to elongate a lot of the muscle groups and in some cases, bend anatomical rules to get it all looking right! |
 |
| Oddly, I think it needed the loin cloth to really get me believing this could be a real creature! |
 |
| The leg on the right still needs needs slimming, but the muscle posing is now fully locked in. Also, now that the base is mocked out, I can finally start the feet! |
 |
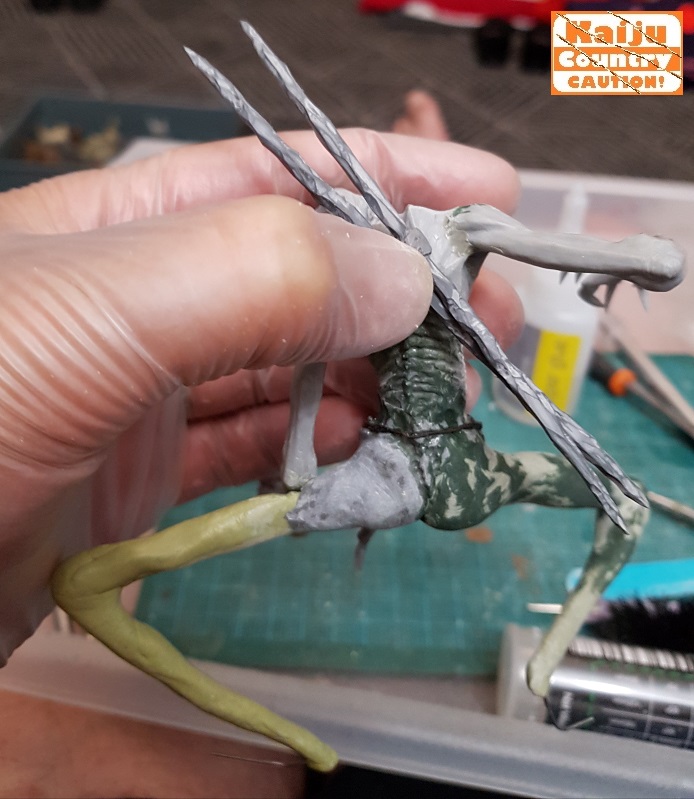
| Here's a view of the ice spears which will attach to his back and the spinal column which you can see now extends right down to the end of the Coccyx |
Well, that's all for now, but stay tuned for more updates soon!
Goddenzilla :)