A wretched hive of scum and villainy
 |
| Cheers! |
It's been months since my last post - I had to pack the Imperator away for Christmas again and so I looked for another (smaller?) project to occupy more over the festive period. Thus I began my foray into the Underhive!
I really like the fact that Necromunda is a narrative driven games system and as such would benefit greatly from set pieces and NPCs. As it happens, this is the exact thing that I love making! :)
Necromundan Hive Bar
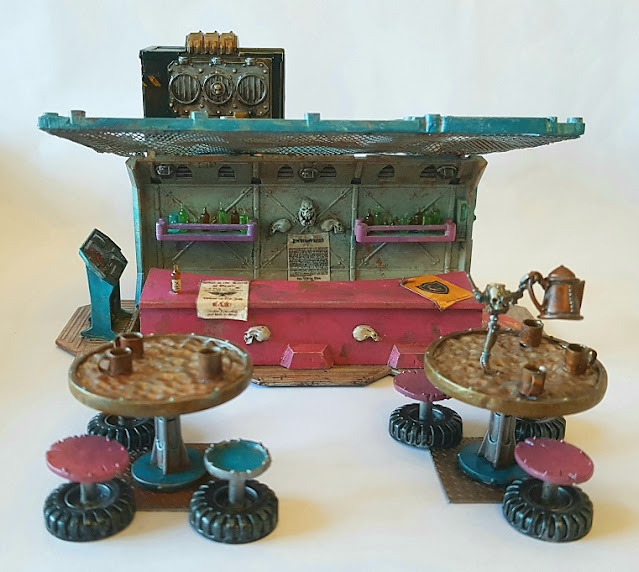 |
| Pull up a chair and enjoy some Underhive hospitality! |
What better venue for scenario play than a bar? I plan to use this as a hub for hive informants, hiring scum and bounty hunters as well as using the bartender as a lookout.
There are many possibilities for this set piece including using the patrons to wade into skirmish games when a brawl breaks out!
Building the bar
The bar itself was relatively straightforward to build - I used half of a 40k storage container with the floor / roof panels cut and stuck together to increase the footrpint of the shack.
I then created a ramshackle overhanging roof with some aluminium mesh over an empty sprue. I used some components I had lying around to make a control panel till, chairs and tables. I made tin cups from round styrene cut to size, capped on one end, then small handles added from a smaller gauge tube.
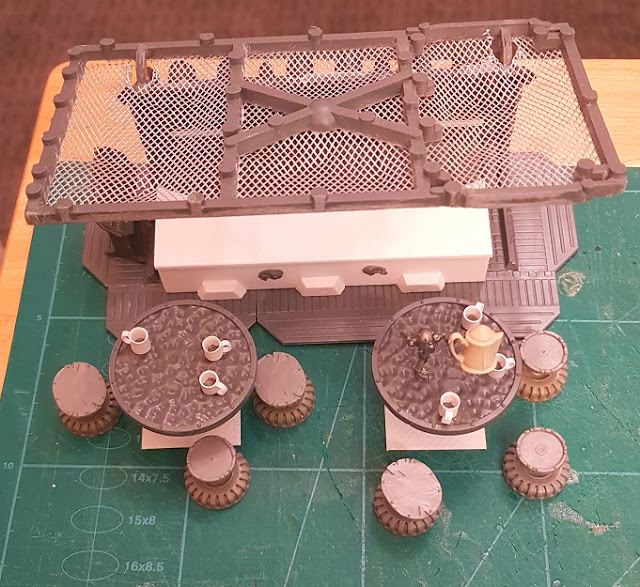 |
| The tables and chairs are made from shields, tyres and the Necromunda turn tokens |
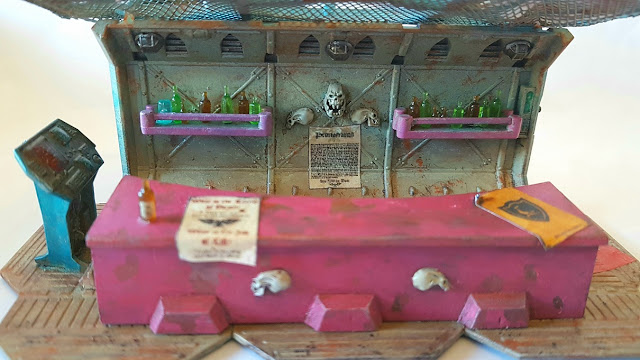
 |
| The bar itself was made from Foamex and has both cups and a sneaky rifle hidden under it! |
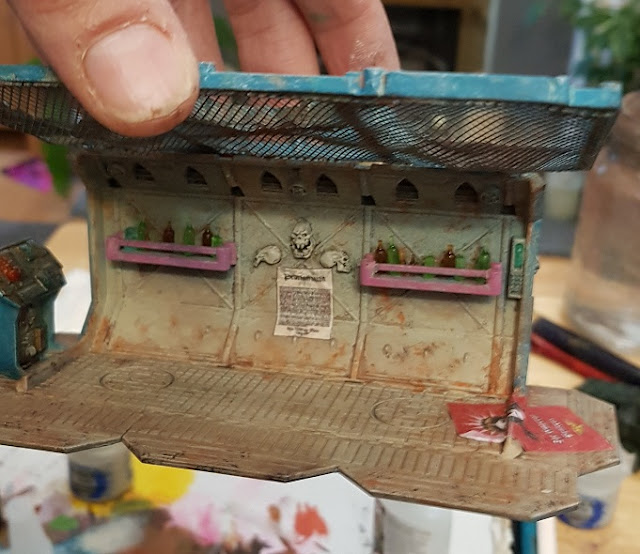 |
| I made some shelves with tiny bottles for the back wall and decorated the wall with some xenos skulls |
 |
| Once I'd painted the bar with some cyberpunky colours, I fixed the bar in place and littered it with posters |
 |
| Even the roof has some discarded flyers on it! I fixed each table and 3 chairs to a small base plate so that they can be placed in the vicinity of the bar without becoming fiddly |
 |
| As an added extra, I decided to install some lights at the back of the bar - these add atmosphere and make for a really moody scene! |
 |
| I snipped off the original lights and added some clear resin ones in their place then installed micro LEDs behind them (encasing them in resin), then carefully painted the metal grids |
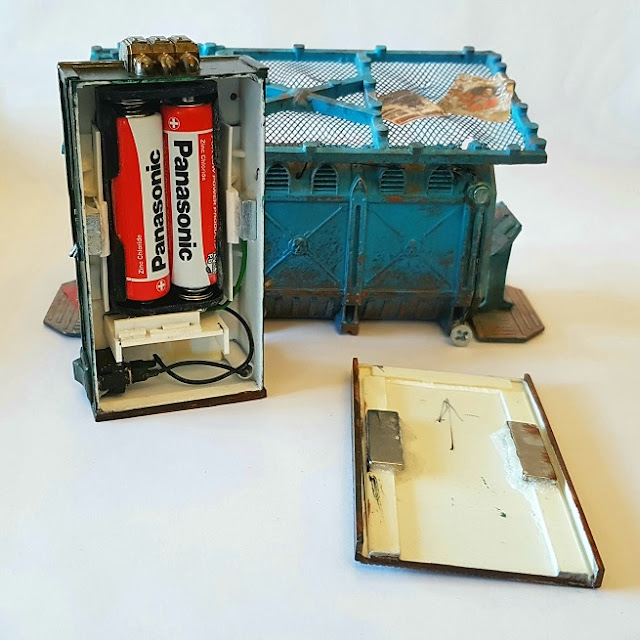 |
| I fed the cabling through the back of the bar and created a magnetic coupling which attaches to a vending machine at the back. This holds the batteries and on / off switch behind a magnetised front plate |
 |
| You can see the magnetic couplings at the rear of the vending machine |
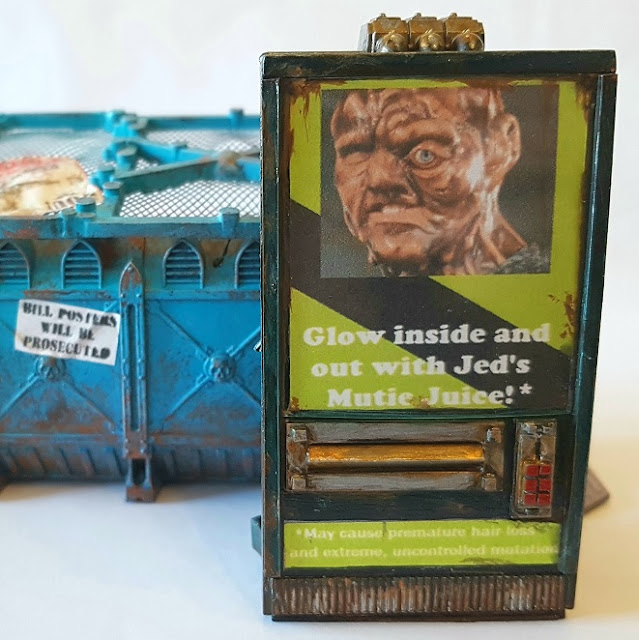 |
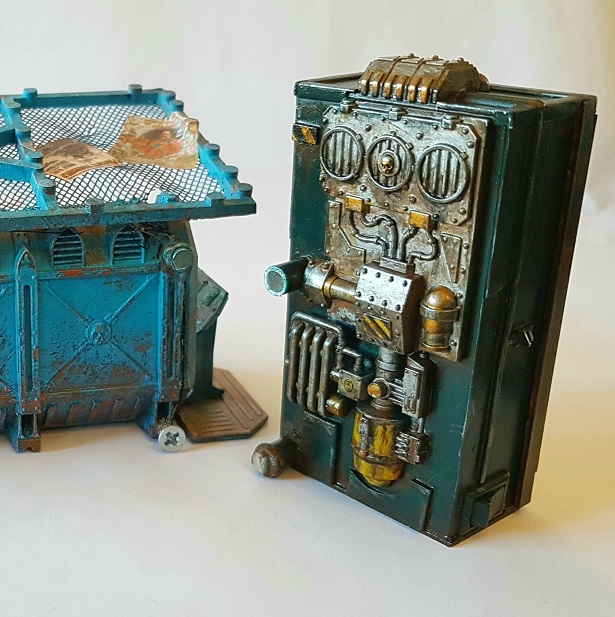
| And with the front plate on, the battery compartment is nicely hidden! Creating the vending machine took longer than the rest of the bar! |
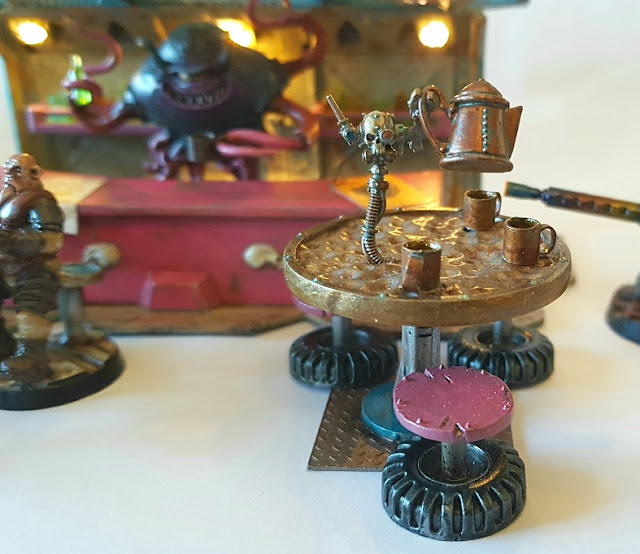
Bartender and Patrons
No bar would be complete without a bartender, so after scouting around for a while, I decided to use a resin
Occulak from Heresy miniatures. I wanted the bartender to be quirky and stand out, so this model was perfect!
 |
| I cut away all of the base support from the miniature and made a custom base with a wedge cut out so that it would fit easily behind the bar. I then heated and bent the tentacles so that he could be holding both a bottle and tin mug |
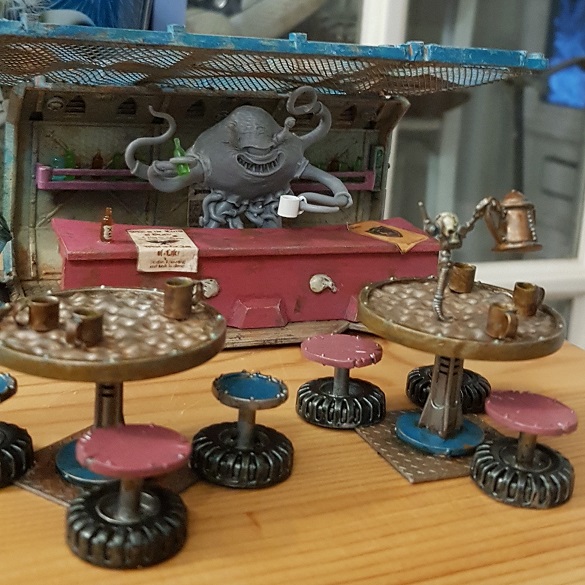 |
| The fits perfectly behind the bar! |
 |
| The fully painted Bartender - he looks like he's scheming... |
Lonely Drinker (Morn)
A friend suggested that it would be funny to have the character Morn from Star Trek Deep Space 9 loitering at the edge of the bar. So I sculpted him!
 |
| Gold pressed what?! |
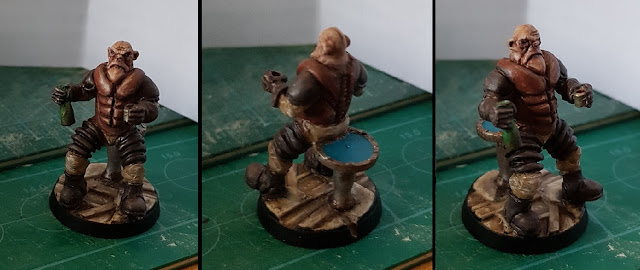 |
| It only took me a couple of evenings to sculpt Morn, perched miserably on the edge of a bar stool. I think he turned out brilliantly! |
Bounty Hunters and Scum
I fully intend to add more Bounty Hunters and Scum to my collection; I've completed a couple and have several more on the way. I love the fact that you can go wild with them - Necromunda can be quite freeing in that respect!
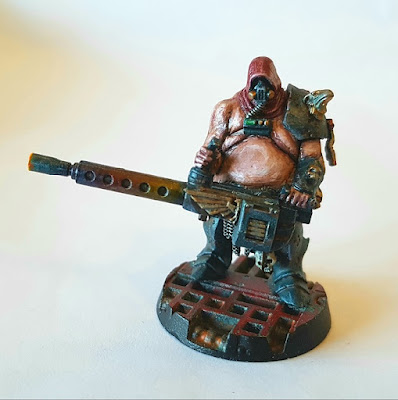 |
| A huge Bounty Hunter lugging a heavy stubber can be found loitering around the bar... |
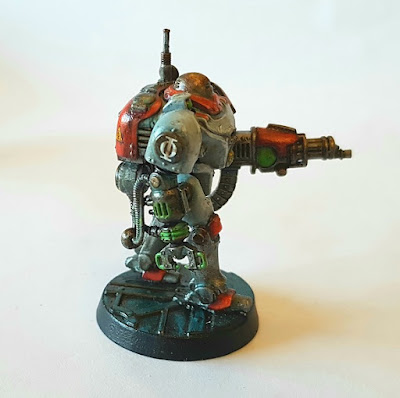 |
| I picked up another UR-25 from Blackstone Fortress to use as a Man of Iron or Bounty Hunter. I replaced his claw arm with an arc welder so that he wasn't exactly the same as the original model. |
Rogues Gallery
 |
| A 41st millennium bar-maid |
Industrial Chemical Plant
I decided to give MDF terrain a try to see how it stacked up against plastic scenery. I picked up an industrial plant from TTCombat and I have to say that for the price, it's great value. Having said that, if you're a perfectionist like me, the tabs and gaps which MDF terrain leaves you with are a bit of a frustration. There is also a lack of surface detail. I ended up cladding much of the surface with styrene for detail and gap filling a lot of it with putty as there were so many holes!
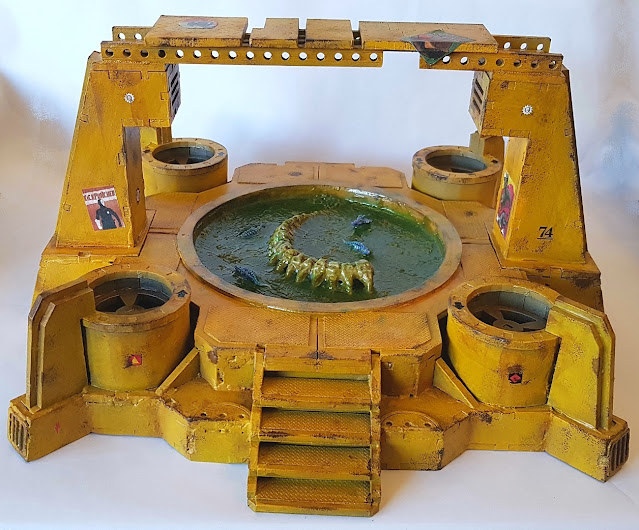 |
| I added a walkway over the top of the chemical vat so that there was a lot more surface area to game on |
 |
| I also added a number of posters for flavour. These were just printed out normally then stuck down and sealed with mod-podge |
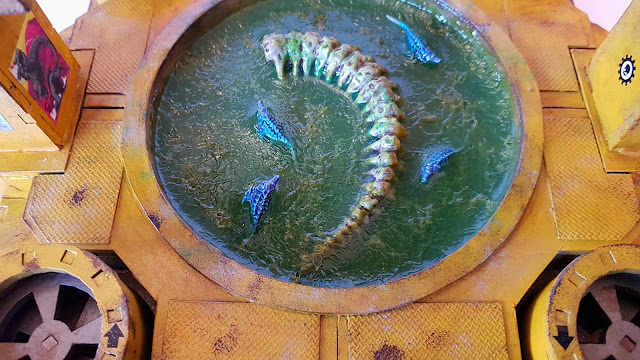 |
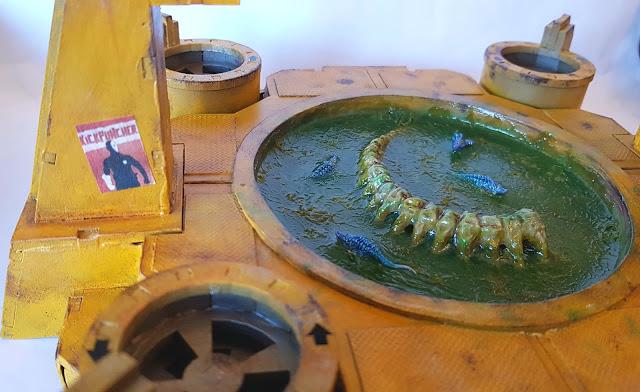
| The skeletal remains of a large beast languish in the chemical pool |
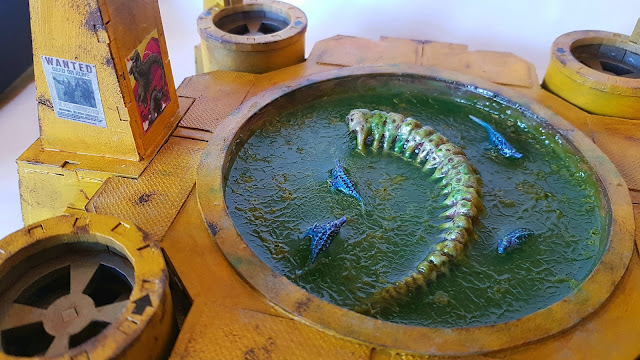 |
| I used some spare Tzeentchian sharky creatures from my bits box to represent the deadly monsters which stripped the carcass |
 |
| The chemical plant was lined and filled with green tinted clear resin to make the pool |
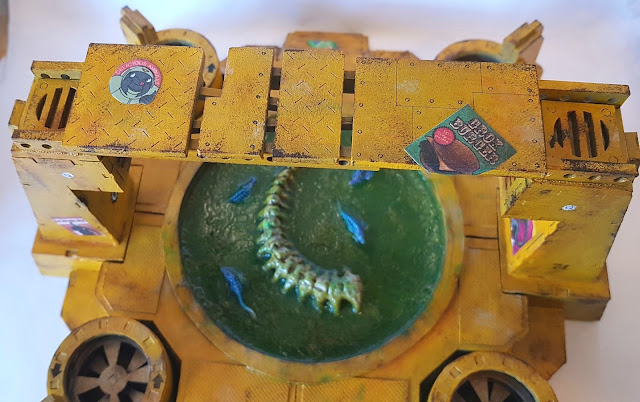 |
| I added decals and trodden in flyers to the model for thematic detail |
Overall, I found that MDF kits are probably not for me as they have significant limitations and some aesthetic issues which I just can't overlook. But that is my opinion and I know a lot of people use these kits to very quickly set up a battlefield! I'd advise trying out a smaller terrain piece before diving in - maybe you'll find you love MDF more than plastic!
Scatter Terrain
 |
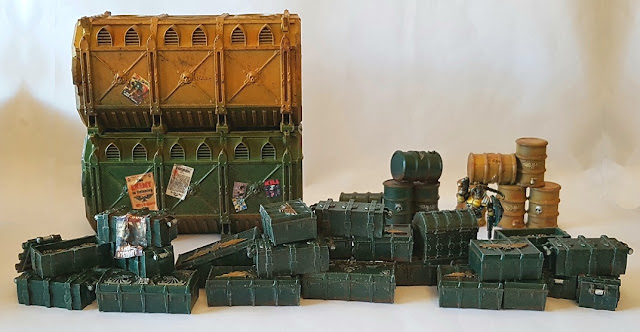
| A large collection of ammo crates work well as a defensive position! |
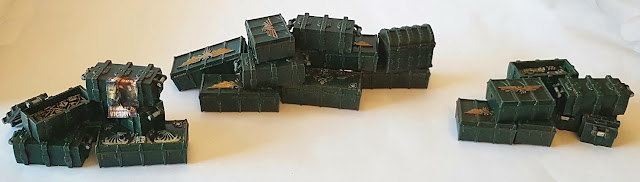 |
| I spent a while stacking the crates up until I was happy with their positions, gluing them together to make 3 clusters which can be moved around without scattering pieces everywhere! |
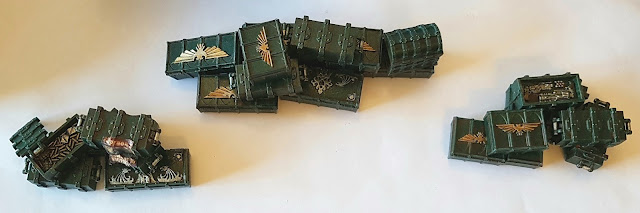 |
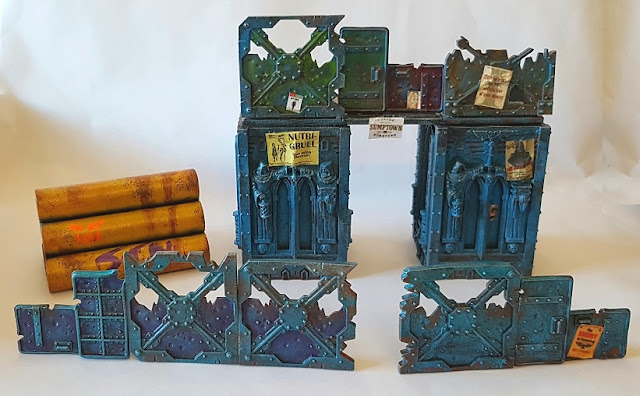
| The three crate stacks were made with a Tetris style layout so that they can be slotted together in various configurations or just placed around the board as individual clumps! |
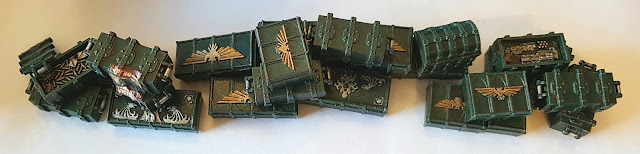 |
| I like the straight defence line layout |
 |
| I also made two barrel clusters with the same idea in mind. |
 |
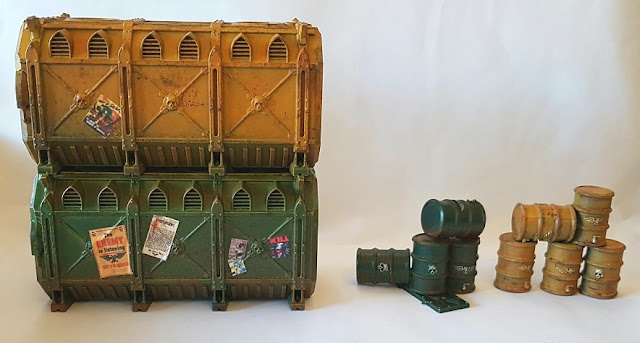
| The containers were fixed one on top of the other, with the bottom one functioning as a tunnel, providing much needed cover in a storage bay... |
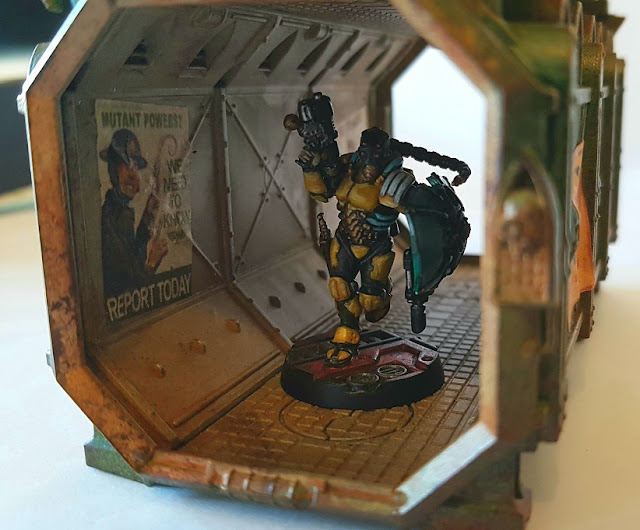 |
| Even the walls inside a container are not safe from those poster hangers! |
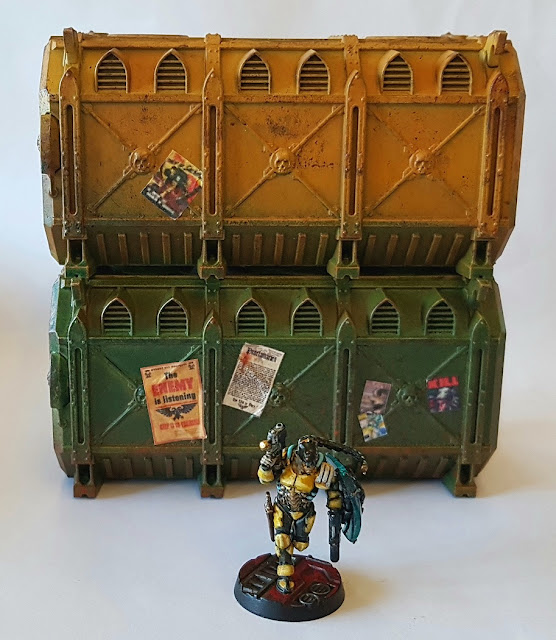 |
| 40k containers are perfect for blocking line of site by a couple of levels when stacked while providing an interesting armoured tunnel from one area to another |
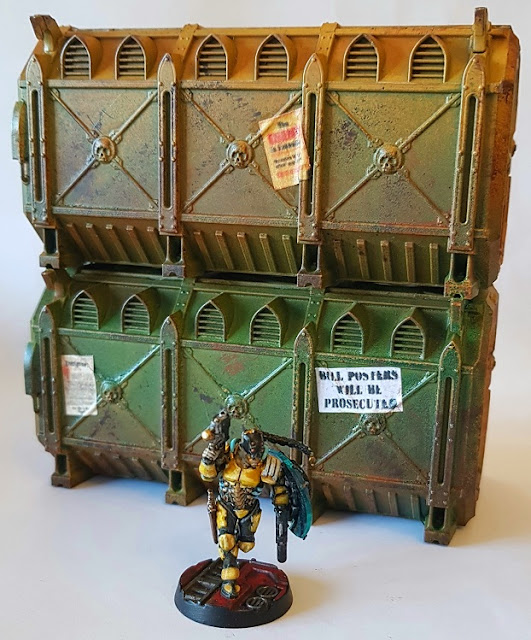 |
| Pictured here with one of my Van Saar gang members. More pictures will follow when the gang is complete! |
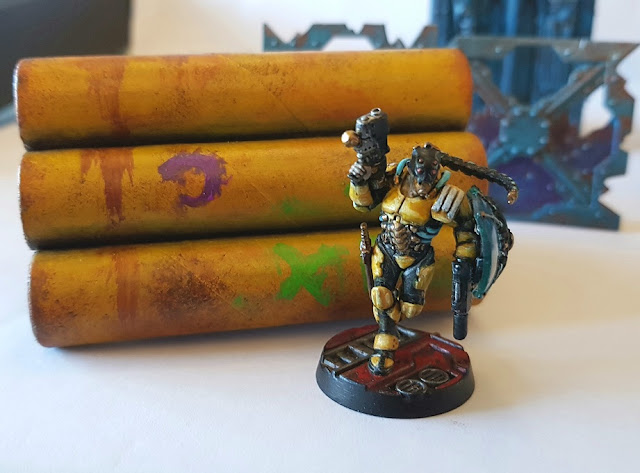 |
| These stacked industrial pipes were made with heavy cardstock tubing which I had squirrelled away. Again, they provide a nice little cover section. |
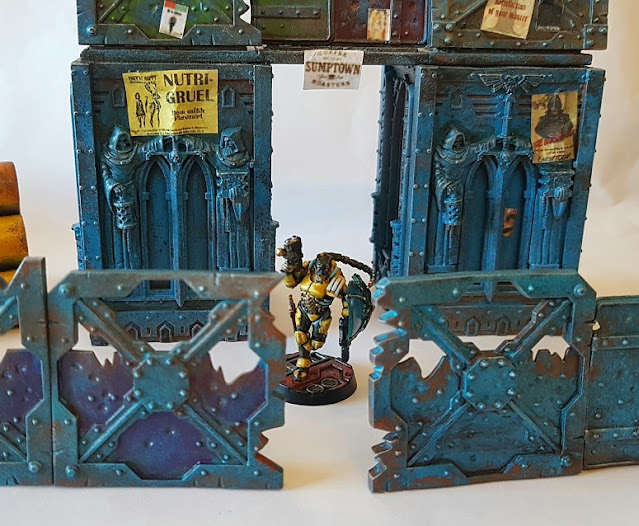 |
| This watchtower / bridge was made with some leftover cities of death parts and the Necromunda barricade sprue |
 |
| I also painted up the barricades themselves. I used a sort of neon cyberpunk colour scheme on my terrain as I like the back-alley tech vibe it gives |
A brief return to the Blackstone Fortress
As my Blackstone Fortress gaming adventures continue, I've been trying to get the miniatures from the main set and expansions finished. Below are some shots of my progress!
 |
| Aside from making bases to match my other BSF miniatures, I tried to paint the Ambull and Bore-Wyrms exactly like the box art. I think they came out pretty well! |
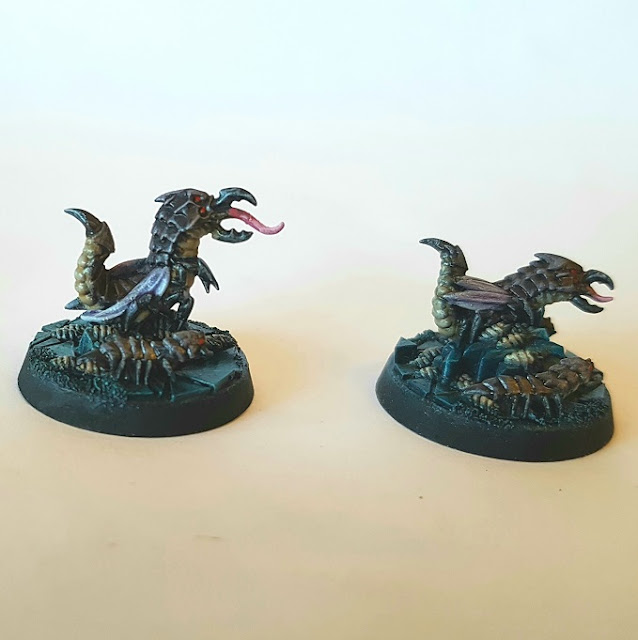 |
| Freaky little beasties! |
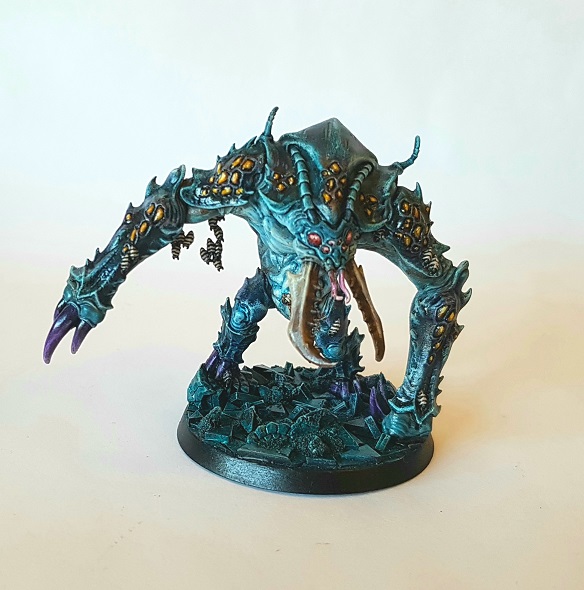 |
| The Ambull was an absolute joy to paint - if GW ever re-release this model, I'll be sure to pick it up again. |
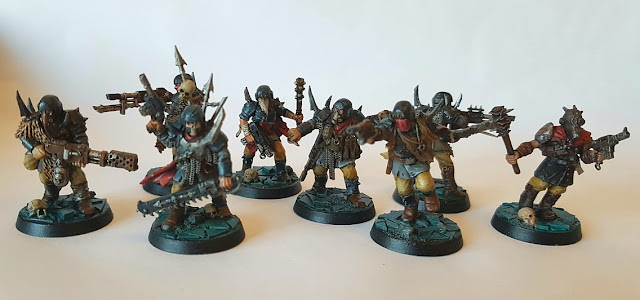 |
| I finally completed a whole squad of traitor guardsmen |
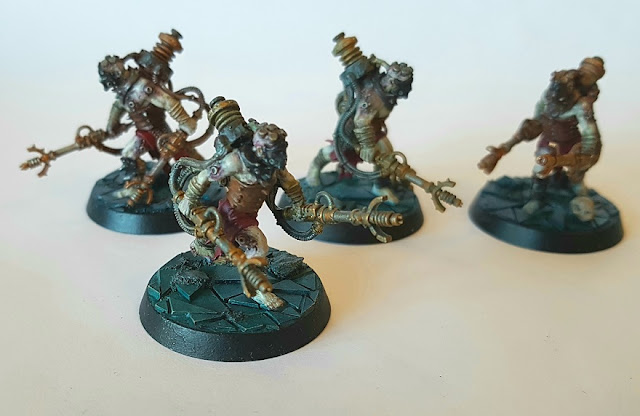 |
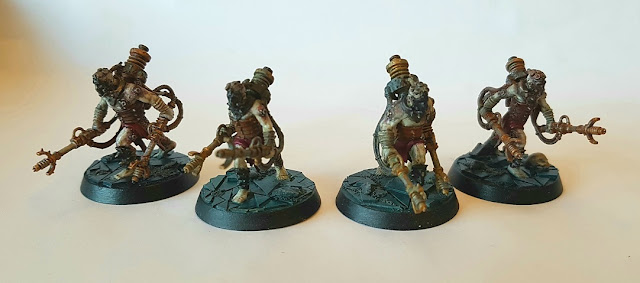
| I also finished a squad of Negavolt Cultists |
And Finally...
Over the Christmas break, I treated myself to Santa Boris from Heresy Miniatures and painted him up in time to be proudly displayed over future festive seasons!
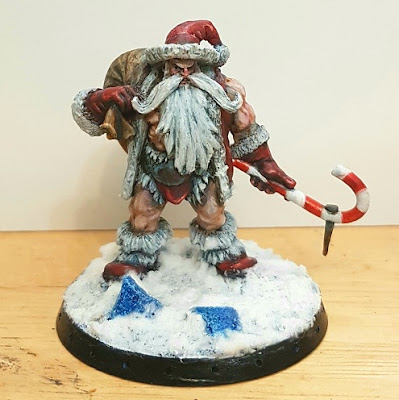 |
| Hench Santa has arrived! |
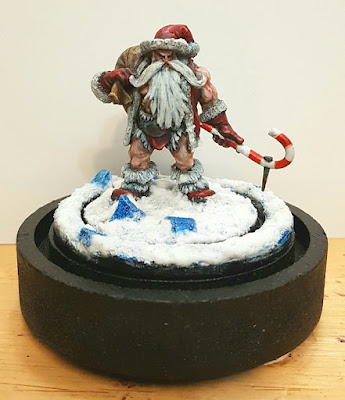 |
| I made him a larger display bade to slot into |
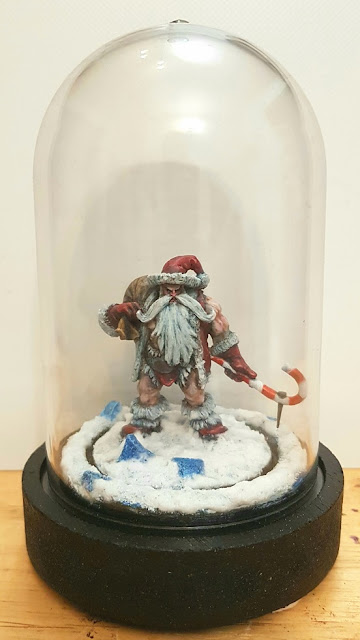 |
| Which houses a nice glass display dome! |


