A titanic Aeldari war machine wakes from its slumber...
In bone and midnight clad...
Isha's Shear actually belongs to my friend Mark and has been a work in progress for quite some time. I first built the titan over a decade ago for a huge apocalypse game we played at Warhammer World. I painted the Phantom to a very basic standard with the intention of reprising the project.
Unfortunately it fell by the wayside for a number of years until there was a spurt of Xenos activity on the Titan Owner's Club chat that spurred me on.
I decided to give the engine a proper overhaul, disassembling the legs, arms, armour plates and completely changing the base. I feel it's important to note that although I'm a very experienced model maker, I still found this kit very challenging. If you're new to Forgeworld model kits, I'd steer clear of the Phantom until you have several complex builds under your belt. There are multiple sections which will require pinning while presenting very little resin to actually hold one - definitely a kit for veteran model makers only!
I kept a short work log of the refurb, mainly focused on the painting and rebasing of the tian which I'll tag on to the end of the post - enjoy!
 |
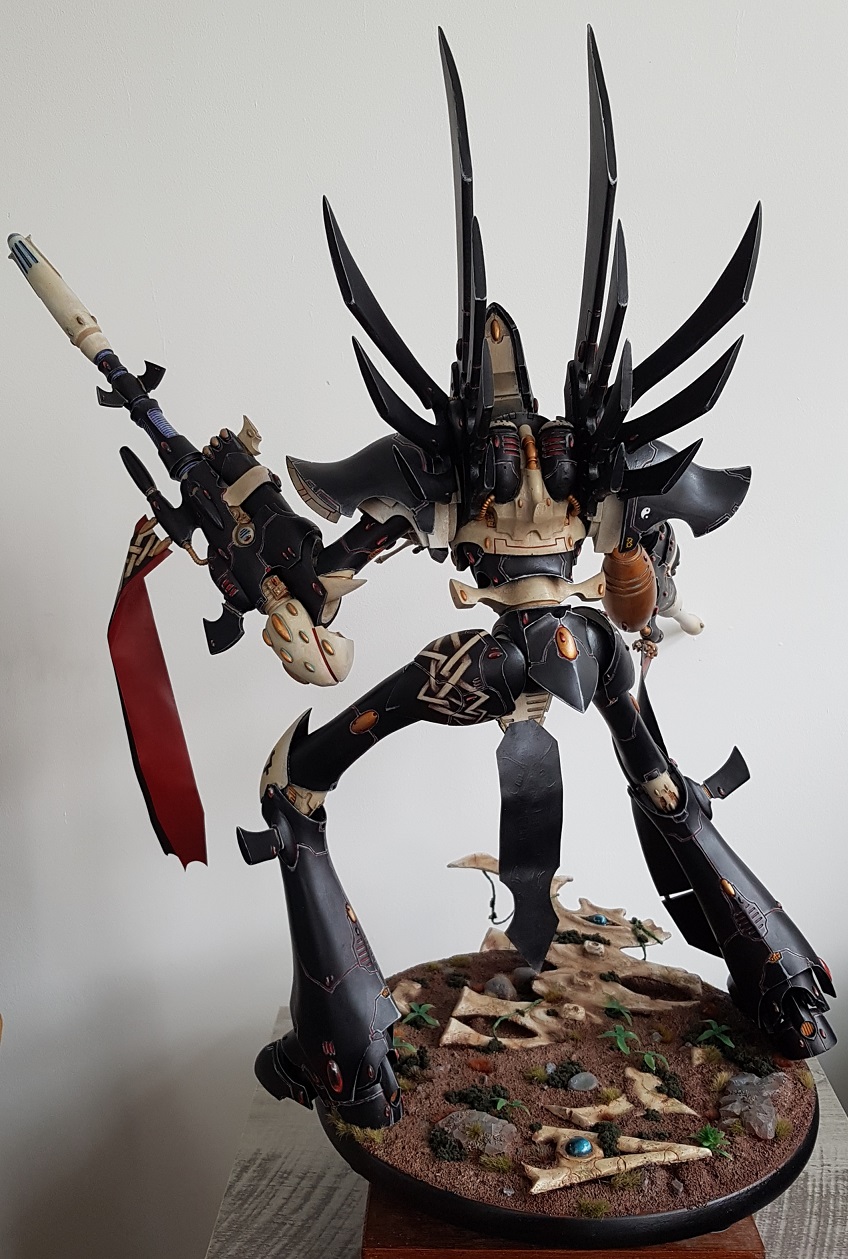
| Isha's Shear in all its glory! |
 |
| The arms are fixed allowing only one armament as I found the weight made magnetising a little precarious |
 |
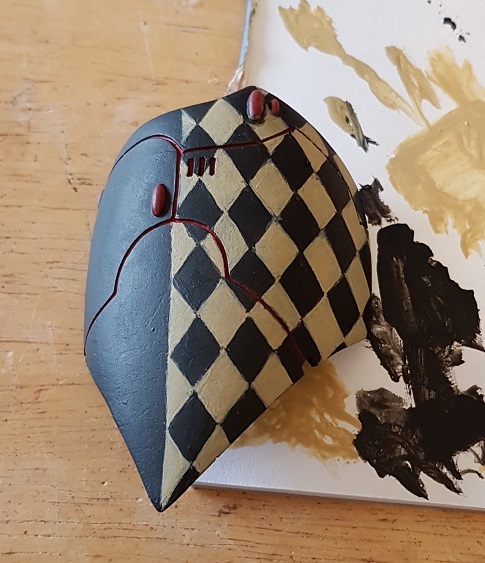
| I rarely paint freehand onto models, but the large flat surface areas demanded some nice detailing! |
 |
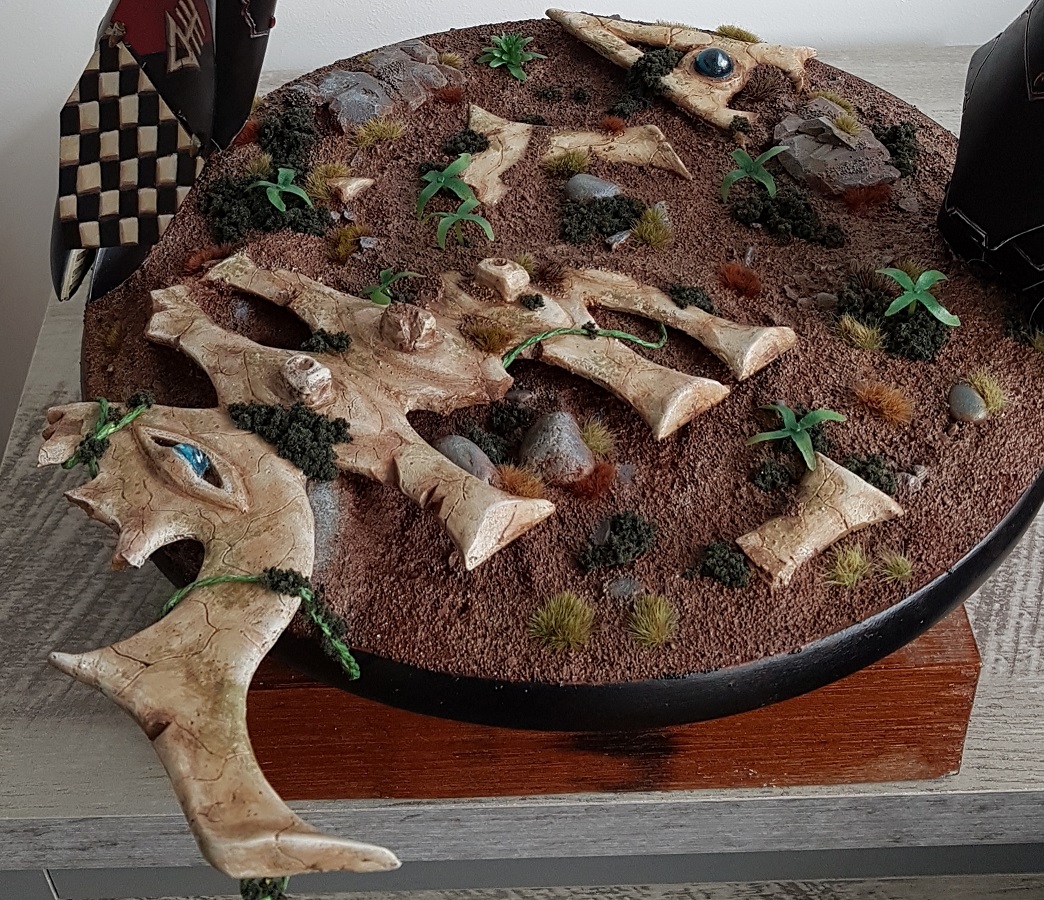
| A base is essential for a Phantom titan as it has a very high centre of gravity and a tiny footprint compared to an imperial engine! |
 |
| I used a black and bone colour scheme to emphasise the fact that Eldar titans are grown and shaped from Wraithbone |
 |
| I find clean, sharp paint schemes to be the most challenging, so I was very pleased with the final result |
 |
| The large banners make the Phantom look very regal and are a direct call-back to the original epic style |
 |
| The crotch banner helps to fill the large gap in the wide, dynamic stance of the titan |
 |
| Even though the patterns are still bone coloured, the cheques and plaits are very distinct against the rest of the armour |
 |
| I deliberately placed all of the bone lattice plaits on one side of the engine and chequers on the opposite to create a dynamic but cohesive scheme rather than a chaotic mess! |
 |
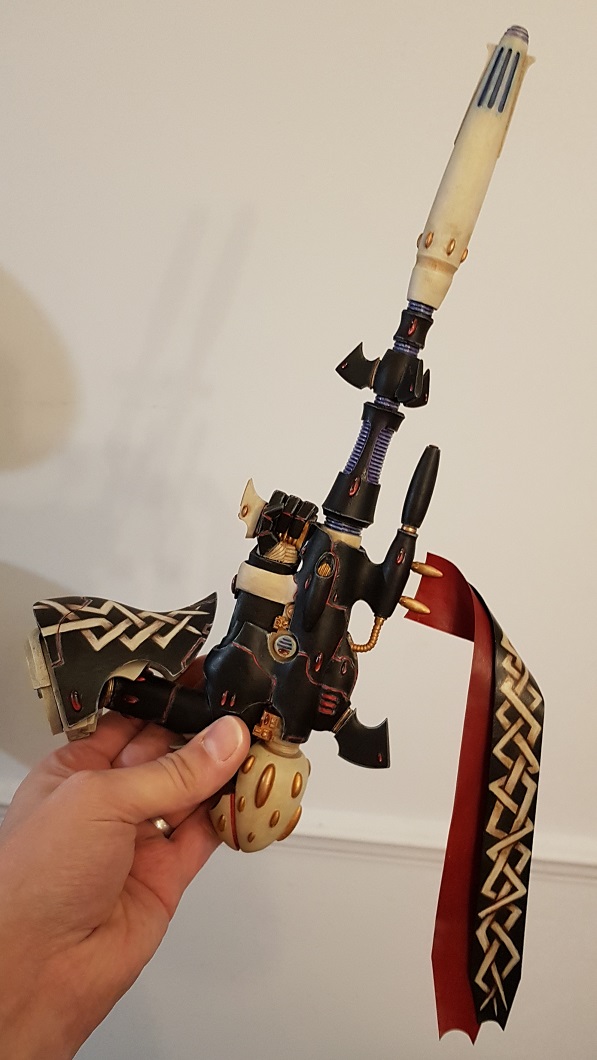
| I intentionally added a twist to the D-Cannon banner and backed it with a red background banner so that it was easily visible to the front and simulated a little movement in the fabric |
 |
| As you can see, the Cheques / plaits are carried across to the banners on each side as well |
 |
| The huge Eldar rune was needed to fill the base with some detail as the feet occupy only a fraction of the space! |
 |
| Highlighting all of the panel lines was probably the most taking part of the painting! |
Refurbishing
As the majority of the build was originally completed with super glue, I found that a number of joints were weakened and so I decided to disassemble any load bearing sections and smaller panels, then pin and reassemble them all after repainting the model.
 |
| The Phantom before its refurbishment... |
Arms / Plates
 |
| I started by repainting the arms, shoulder pads and collar bone armaments as they were some of the smaller parts and could be set aside while I worked on the body |
 |
| As I knew they would be feature areas, I completed the shoulder pads first and used them to inform the rest of the colour scheme |
 |
| I frequently tested the pads against the arms as I progressed in order to keep the scheme consistent. Note the occasional use of blue (with hints of purple) to pick out cells and vents. This just adds a little extra interest and breaks up all of the red, black and bone. |
 |
| I mirrored the chequer and plaite patterns on the thigh guards so that they matched the shoulder pads on each side |
Banners
I initially sketched out several designs for the banners - once I was happy with how I wanted them to look, I drew the design onto some thick paper and created borders with masking tape to help reduce warping. I blocked out the main colours starting with black, then bone and finally red.
 |
| The basic colours of the design were painted on as accurately as I could with fairly thick acrylic paint |
 |
| After all of the main colours were blocked out, I then started detailing the bone colours |
 |
| Finally I painted the golden eye of Isha with yellows and browns using some NMM lettering for reference |
 |
| Finally, I sharpened everything up with extremely fine black outlines, cut out the banners with a knife, blacked out the back and sides of the paper, then assembled the banners with poles and brackets made from plastic Eldar spares |
 |
| The finished banner next to the weapon it would be mounted under |
 |
| The original sketch for the crotch banner was a lot more complex than the arm banner design, mimicking fishbones |
 |
| I followed the same process as the D-Cannon banner, but did not use cheques or plaites as this would be mounted on the centre line |
 |
| The long streamer design allowed me to do much longer bone knot work than that on the shoulder or hip plate |
 |
| The long thin banner was also easier to twist down from the weapon than a wider banner would have been |
 |
| All of the banners and freehand feature areas were completed and varnished before I moved on to the body |
Basing
The original base for the Phantom was made from styrene and never felt particularly sturdy as it was too thin for deep pins and had a tendency to flex, cracking glue and surface details. As a result, I chose to remove it completely and start from scratch.
I used a large wooden base and it was heavy enough to prevent toppling and thick enough to allow for deep pins into the Phantom's feet.
Because the Phantom is in a very wide, dynamic stance, I found that there was very little base surface taken up by the model's feet. This left me quite a lot of empty space to fill with some nice detailing!
I opted to make a large wraithbone rune, broken and half buried in the ground. This would represent some form of ancient monument, toppled in eons past and slowly reclaimed by jungle creepers.
 |
| I started by making the full rune shape from several layers of foamex which I sanded to give a fairly smooth surface. I then covered the whole thing with car body filler and re-sanded it again |
 |
| Finally, I went back over the whole surface with milliput, allowing me to add bone texturing to the surface. |
 |
| I broke up the rune into several pieces and tried them out on the base |
 |
| I repositioned them a couple of times until I was happy with the placement |
 |
| Once I was happy with the look, I textured the rest of the base, adding rocks and gravel before painting everything and adding some vines and jungle vegetation |
I didn't bother document the painting of the main Phantom body as it was a pretty straightforward process of painting all of the recesses red, re-blacking out the panels and edge highlighting them. I'm really happy with how the final titan looks and I'm glad my friend liked it too!
After that little palette cleanser, I'll be returning to more familiar titan work in my next blog post, so stay tuned for my next Imperator build mega update soon!


