Imperator - a giant will stand...
 |
| The torso as it currently stands - it's really starting to look like an Imperator even though it's still only basic shapes, you know exactly which titan I'm replicating! |
Another week, another Imperator build progress post! Since my last update, I've been working hard on this beast; I hope you enjoy the update!
Support struts, and surface detailing
I have now capped all of the main support struts on the torso and have also added exhaust vents to the ends of all four rear facing supports.
 |
| I really like the exhaust vents on the rear struts; they add some functionality to the these structural areas, reminding you that they are part of a large machine rather than just architectural supports. This picture also gives a better view of the rear engine array and platform |
 |
| The central support struts have their styrene caps added in this picture - the other supports have also now been given the same treatment. I carefully cut the styrene plates to the correct size, fitted them with super glue then sanded them flush at the joints. All of them will be filled at a later stage |
 |
| As the Imperator is so huge, there are a lot of flat surfaces which will require detailing. It's one of my favourite stages as I can go crazy making piping, vents, switches and ports. Here are a couple I made to go on the inside of the main rear facing support struts. Once I've filled all of the structural elements, I'll be fixing little details like this all over! |
Shoulder sockets
The Shoulders of a titan take a lot of weight. In the case of the original Epic Imperator, they hang from the underside of the main carapace with supports on the torso. My Imperator would need to be designed to look as though the shoulder sockets were attached to the carapace, but in reality, as it is supposed to be detachable, they would only be physically connected to the torso.
I did a lot of pondering over the shoulder design prior to building them as they would need to be strong enough to take the weight of the gigantic arms, but also functional as I still wanted to be able to remove the arms and carapace from the torso for transports.
As I had already strengthened the torso around the rib area during construction knowing that it would be taking a lot of horizontal weight from the arms as well as vertical weight from the carapace, I decided to spread the weight over as much of the rib area as I could to ensure that the foamex wouldn't buckle.
 |
| The main shoulder sockets were made from three separate Foamex layers - a 5mm layer sandwiched between two 10mm ones. The 5mm layer was pre-drilled with holes for five magnets in each socket prior to assembly. |
 |
| After creating the main sockets, I then created a thick back plate which would be attached directly to the torso. I shaped the back plates and the supports to mimic the Adeptus Titanicus 'T' symbol |
 |
| After sanding and filling, I added surface detailing and styrene capping to the layered areas along with ports for the cabling which I had left spaces for within the armpits |
 |
| I had saved some spare Warhound cables for this very job - once I'd glued the shoulders into place, I heated and shaped the resin cables and glued them to the receivers I'd added to the reinforced rib area |
 |
| Here's an underside view of the shoulder with the carapace in place - it all fits beautifully (phew!) |
 |
| The shoulders also take a little of the weight from above, spreading it across the super structure |
 |
| I intend to add some more detail under the carapace at a later date to go around the shoulders, really tying it all together like the power plant which plugs in at the rear |
 |
| I constantly refer back to the original model to check the scale and shaping. It was never intended to be an exact copy of this design, but I really am trying to stay faithful to the proportions and feel of the original design while bringing it inline with the more modern titan aesthetics already honed by Forgeworld |
Leg Build
The Imperator's legs are another iconic area of the titan which I really wanted to get right. When thinking about the legs, I wanted to include all of the elements listed below while still trying to keep the original design's distinctive silhouette. It's not enough just to build a big robot with bucket legs; it had to look and feel like an Emperor class titan; capable of moving while still housing a battalion of Skitarii in each of its bastion-legs.
- Must have a round footprint
- Must have three large toes at 3, 9 and 12 O'clock
- Must be able to transport troops in the feet
- Must still be able to move convincingly
- Must have large curved armoured shins
- Must look cool!
With all of these elements in mind, I set about designing the shins and thighs. Added to the design considerations would also be the structural concerns as the knees and hips would be taking the full weight of the titan and would be the weakest points on the whole structure. They would need to be reinforced but still posable as I want my titan walking rather than stood static like the original miniature.
 |
| The first step was building the underlying structure for the shin guards. Although the surface is currently flat and vertically straight, I will be sculpting the compound curves which form the shin guards once I have the legs completed, so for now, it's fairly blocky and basic |
 |
| Blocky and basic does not mean small... |
 |
| ... or weak! The shin is reinforced to ensure that it can take a bit of weight even though it's only actually going to be lending the legs a little horizontal support |
 |
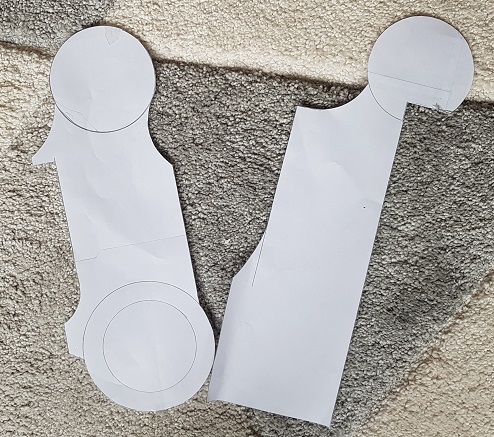
| I did a lot of sketching before starting to draw up a 1:1 blueprint for the legs |
 |
| Once I was happy with my blueprints, I firmed them up accurately with a mechanical pencil, isolating the main structures from the surface details and noting which layers would be part of the load bearing structure |
 |
| Next I used my front room window as a light box to trace the main leg sections onto plain paper to make a pattern which I cut out... |
 |
| ...and stuck to construction board to create working templates for the main parts. Note that I worked out the thickness of the Foamex and number of each parts I'd need for the legs so I could easily keep track of everything |
 |
| I used the card templates at this stage to mock up the leg and test both the scale and fit before I prepared to mark out the components |
 |
| Again, I think it's useful to refer back to the original throughout the build process! |
 |
| Although the legs will be considerably thicker than this cardboard cutout, you still get a feel for the silhouette... |
 |
| ...and size of this monster! |
 |
| For now, the main shin guard remains separate from the foot as I will need to be able to remove it in order to create the armour plating |
 |
| It does lock in place though! |
 |
| I used the templates to mark out all of the leg components that I'd need to cut in order to make both shins and thighs |
 |
| Once I'd cut all of the components (which takes a looooooong time...), I glued them together in their sub-assemblies and sanded them roughly so that I could test fit the parts |
 |
| The parts look a little rough now, but they will be more thoroughly sanded and filled before the final assembly |
 |
| And here is the first shin test assembly! |
 |
| This things is so chunky! |
 |
| This foot and shin isn't finished yet, but it already weighs as much as a warhound titan! |
 |
| And to give you an idea of just how large this thing is... |
 |
| A servitor guards the shin doorway! |
A little AT snippet
Finally, I thought I'd show a little Titanicus terrain piece I made on a whim!
 |
| It's a tiny Adeptus Mechanicus tyre fitting yard! |
 |
| It has a little service ramp, tyre pressure tank and a little shack! There's also room at the back for an advert banner... |
 |
| Behold, Adeptus Tyretanicus! |


Awesome beast! Getting huge and where are you storing this beast? Does it have its own room?!
ReplyDeleteHe is indeed getting big! Unfortunately I don't yet have a dedicated storage solution although I will be looking for suitable crates once I have all of the sub assemblies in their final configuration. He'll have to live in the garage with my other metal babies, only seeing sunlight when traitor engines are sighted! :)
DeleteLooking excellent mate. i can't wait to see the inevitable Titanicus version.....not sure i'll have enough engines to defeat it though ;D
ReplyDelete